Birdie Teacup Biscuits

The birds in my neighborhood are at their most bountiful this time of year.  Fat little finches, pointy-beaked hummingbirds, and even skinny-legged walking birds are all around the trees and grounds where I live, busy tending to their nests and chirping away.  On our daily walks, my cocker spaniel Fred gets a huge ego boost from terrorizing each and every bird that he spots.  It’s in his spaniel genetics to hunt and retrieve fowl, which is good for his metabolism but bad for my arm.  At the end of the day, Fred is the sweetest of souls–actually being capable of intimidating another living creature brings him the ultimate satisfaction.

These Birdie Teacup Biscuits are inspired by the beautiful birds Fred and I have come across this spring.  Back during Christmas time, I saw the most adorable recipe for mini gingerbread houses perched on the rim of a mug.  While it’s more common to find decorated cookies on the rim of teacups, I thought that decorating some savory crackers in a spring theme might be a welcome change.  Here, I use a simple large leaf cookie cutter to create the birds.  The technique of cutting open a wide slit in the cookie to allow for it to hang on the edge of a teacup can be used with a more intricate bird cookie (from a more elaborate bird-shaped cookie cutter), or any other cookie shape for that matter.

These biscuits basically taste like homemade Cheez-Its that are thicker and just a bit softer. They are reminiscent of the cheddar crackers and cheese straws commonly enjoyed during a Southern-Style tea time, with a hot cup of well-rounded black tea or minted iced sweet tea.

When the biscuits bake up, they become slightly puffed and golden, giving them an uneven and rustic finish.  These biscuits are the savory version of a good decorating sugar cookie recipe–they are able to keep a cut shape extremely well and don’t warp after having been baked off.  I’ve made these biscuits in two variations here–a traditional yellow cheddar version and also a white cheddar version flecked with yummy dried herbs throughout.

I’ve debated with my sister and husband as to whether these crackers look more like birds or more like fish.  They both suggested that my creatures were somewhere in between the two, although I think the fish association is probably because everyone is always thinking about those packages of little goldfish crackers.  If you are into fish more than fowl, just forgo adding the pumpkin seed beak and you’ll end up with one large orange guppy about to plunge into a bowl of hot tea.  And if you like the original bird look, feel free to play around decorating with the nuts and seeds.  You could even add layers of sliced almonds to create a ruffled look to the birds.

Serve these Birdie Teacup Biscuits with a strong, flavorful black tea as a zesty and whimsical little springtime snack.  Luckily, this is one kind of bird that my feisty boy Fred won’t be able to chase away!

Birdie Teacup Biscuits

Makes 24 biscuits.

Ingredients:

1 cup flour

6 oz. sharp cheddar

2 oz. grated parmesan

3/4 tsp salt

1/4 cup butter, at room temperature

1 Tbsp water

1/4 cup pumpkin seeds

1/4 cup whole almonds, cut into halves with a sharp knife

1 Tbsp black sesame seeds

bench flour

{Yellow Cheddar Variation}

1/2 tsp smoked paprika

1/4 cayenne

{White Cheddar Variation}

1 tsp dried rosemary, crushed into bits

1/4 tsp dried thyme

1/2 tsp dried parsley

Equipment:

food processor, fitted with steel blade

grater(s) for cheeses

plastic wrap

work surface

rolling-pin

large leaf-shaped cookie cutter

cookie spatula

paring knife

thin drinking straw

toothpick

large baking sheet fitted with parchment or silpat

cooling rack

Directions:

1.)  Place flour, shredded cheddar, grated parmesan, and salt in a food processor and pulse until you get even, sandy looking mixture.

Now add the spices from the {Yellow Cheddar Variation} or the herbs from the {White Cheddar Variation}.

Add in the butter and pulse several times.

With the food processor running, add the water to the dough in a thin stream until the sandy mixture clumps into a ball.

Remove the dough from the food processor, wrap with plastic wrap, and place in fridge to chill for at least 30 minutes.

2.)  After 30 minutes, scatter some bench flour on a large work surface.  Place the dough on the bench flour and scatter it with a bit more of the bench flour.  Roll the dough out until it is an even 1/4″ in thickness.  Lightly flour the cookie cutter and cut out 12 Birdie Biscuits.  Preheat oven to 350 degrees F.

3.)  Use paring knife to cut out a small opening on the lower side of each birdie.  Find a spot around the center of the cracker, where the weight will be balanced once it’s placed on the teacup.  Use a thin straw to guide how wide you should make the opening.  The opening should be 1/4″.  Use the open end of the straw to finish off cutting a smooth rounded edge inside the small opening.  Transfer the cut cracker dough pieces onto a large parchment lined baking sheet, about 1″ apart from one another.

4.)  Insert a pumpkin seed into front tip of each Birdie Biscuit to create a beak.  To create wings, shove an almond half or 3 pumpkin seeds into the middle of the biscuit.  Sink the almond or seeds into the dough so that they will stick to the cracker after it has been baked off.  Create an eye for the bird by carefully placing one black sesame seed on the biscuit using a toothpick to push the sesame seed into the dough slightly.

5.)  Bake the biscuits for 10-12 minutes or until lightly puffed and browned.  When done baking, place on large rack to cool completely.  Place cooled biscuits on the edges of teacups filled with tea for a fun and festive accent.

*** Tip for Hanging Birdie Biscuits:  If the biscuit and teacup seem to slip up against one another too much, use a small dab of corn syrup on the inside and outside of the area on the teacup where the biscuit is being placed.  This will help to create some tackiness so the biscuits don’t slip around the teacup’s edge.

Rainbow Spring Rolls

Spring rolls are one of my all-time favorite foods.  I love them anytime of the year, even in the winter and fall.  For lunch, dinner, or even as a light snack, they are always a welcome addition at my table.  Especially as the days get longer and the weather gets warmer, spring rolls become the perfect meal.  These Rainbow Spring Rolls with Sweet & Sour Sauce are delicious enough to suit the taste buds of meat eaters and vegetarians alike, and it’s very possible that even the kiddos might love them too!

As much as I love baked goods and delectable bites, my background in healthcare reminds me that balance is the key to a happy life.  When I try to make a traditional recipe healthier, I like to spend a lot of time making sure that it actually still tastes good.  If a fantastic tasting recipe is also healthy it becomes golden to me, something to remember and make often.  I like that these spring rolls have visual appeal and also taste amazing.  When I look at these Rainbow Spring Rolls my mouth waters the same way it would if I were looking at a cupcake.  Don’t you love it when healthy foods can create that kind of response?

These Rainbow Spring Rolls are made mostly with raw veggies.  The only vegetable I’ve chosen to cook is the asparagus–just a quick blanching to bring out more of it’s flavor and color. Adding a thin slice or two of firm avocado gives rich creaminess to balance out the rest of the crunchy textures.  If I am making these ahead of time, I like to give the cut avocado slices a spritz of lemon juice to prevent them from browning.

The tangy, spicy, Sweet & Sour Dipping Sauce is what makes these Rainbow Spring Rolls shine. It’s common to find ketchup in other recipes for sweet and sour sauce, but this recipe gets its brilliant color from fresh orange juice, a squirt of Sriracha, and a sweet, sunny base of strongly steeped oolong tea.  Oolong is commonly paired with orange in tea blends as both the flavors have a warmth and sweetness about them.  In this light sauce, tea adds depth and character without adding any extra calories.  For another layer of flavor, I use honey as the sweetener here instead of using sugar.

Rainbow Spring Rolls with Sweet & Sour Sauce are the perfect meal as we head into warmer months.  Crunchy, creamy, light, and tangy, these rolls make healthy eating a no-brainer.  With colors so inviting and a taste so fresh, you’ll realize why I think that this recipe is one for the keeping!

Rainbow Spring Rolls with Sweet & Sour Sauce

Makes 12 rolls.

Ingredients:

{Spring Rolls}

1 large red bell pepper, sliced into 3″ long strips

2 medium carrots, shredded

1 large yellow bell pepper, sliced into 3″ long strips

1 bunch of asparagus, cut into 3″ pieces

1/4 head of red cabbage, thinly sliced into 3″ long shreds

1 avocado, ripe but firm, halved and peeled, then cut into thin slices lengthwise

small bunch of cilantro, roughly chopped

3 small scallions, green part thinly sliced

12 spring roll wrappers

{Sweet & Sour Orange Oolong Sauce}

zest of 1 orange

1/3 cup fresh orange juice (1-2 oranges)

1 large clove garlic, crushed

1/2 cup oolong tea, strongly steeped (1 Tbsp loose tea leaves steeped in 1/2 cup water for 3-5 minutes @ 190 degrees F), strained then cooled to room temperature

3 Tbsp rice wine vinegar

3 Tbsp honey

2 tsp low-sodium soy sauce

1/2 tsp Sriracha hot sauce

few drops sesame oil

pinch red pepper flakes (optional)

1 Tbsp cornstarch

Equipment:

fine grater

work surface

large casserole or deep, large dish

medium pot

medium bowl with ice-cold water

wire mesh sieve

Directions:

1.)  Fill a medium pot with water, then bring to a full boil.  Blanch the asparagus by throwing the tip portions into the boiling water for about 45 seconds.  Remove the asparagus with a wire mesh sieve, then plunge into another bowl filled with ice-cold water.  Blanch the non-tip asparagus sections for 1 minute in the boiling water, then remove with the sieve and also plunge into the ice-cold water.  Remove all the asparagus from the cold water and place on a dish to drain off excess water.  Set aside.

2.)  Fill a large casserole or deep, large dish with about 1″ of warm water.  Submerge 1 spring roll wrapper in the water completely, wait for it to soften for about 10 seconds, then place the sheet on a clean work surface.

3.)  Stack 2 strips of the red bell pepper, yellow bell pepper, asparagus, and avocado in the lower 1/3 section of each sheet, towards the center.  Add some of the shredded cabbage and carrots on top of the stack.  Scatter some chopped cilantro and sliced green onions on top of the stack to finish.  Roll up spring roll and fold right and left sides of the wrapper in towards the center of the roll.  Continue rolling upwards (away from you) until you get a completed roll. If you prefer visuals, please check out Andrea Nguyen’s instructions on how to wrap rice paper rolls.  She’s one of my culinary idols, and gives very clear directions on how to do this.

4.)  Repeat the rolling process for all 12 rolls, then make the Sweet & Sour Sauce by first reserving 1/4 cup of the tea and setting it aside.  Add the rest of the sauce ingredients (except cornstarch) into a medium pot, then place the mixture on the stove on medium heat until it comes to a boil.

5.)  Mix the cornstarch into the reserved 1/4 cup of tea to create a slurry.  When the mixture reaches a full boil, turn the heat down to low and add in the slurry.  While constantly stirring the mixture, wait for it to come back to a boil and cook into a translucent, glaze-looking sauce. Pour the hot Sweet & Sour Sauce into a medium bowl and serve along with the spring rolls. Enjoy!


DIY Tea Soap

Have you ever had a tea so fragrant and delicious that you wish you could bottle its essence up and make perfume out of it?  When I came across some Sloane Teas in Toronto last year I realized how tea is actually the culinary version of perfume.  While I can’t blend my own perfumes, what I can do is make soap out of tea!  With a trip to the health food store, an easy-to-use soap base, and some favorite steeps, you can create rustic, nourishing tea soaps in so many shapes and varieties!

Rose Bud Herbal, Earl Grey Black Tea, Lavender Herbal, and Sencha Matcha Green Tea are some blends that I love to drink.  I thought that these teas would also make some refreshing soap blends because of their unique fragrances and cosmetic appeal.  While rose and lavender buds give off the prettiest shades of color, black and green teas have excellent exfoliating properties.
When I originally thought of making tea soap, I was going to do it the authentic way, with olive oil, coconut oil, and one very mysterious ingredient–lye.  After doing some research I realized that going the lye-based route wasn’t going to be as easy as I thought it would be.  Apparently, gloves and goggles are a must when you work with this corrosive product.  At the word “saponify,” I closed out of the “how-to” You Tube video I was watching and decided to hit up my local craft store for some olive oil soap base, a microwaveable soap that’s amazingly convenient and easy-to-use.

If you’ve been to the beauty section of your health food store, you’ll most certainly encounter essential oils.  These oils are concentrated scents commonly used in combination with lotions and creams for moisturizing skin.  The scents are pure and often organic.  A few drops pack a powerful punch of scent.  As yummy as they smell, keep in mind that essential oils aren’t made for culinary uses.  Essential oils are oil-based and will carry scent for a long period of time where food extracts (like vanilla, rose water, or orange blossom water) won’t.

Keep the size, shape, and roughness of your tea choices in mind when you are making tea soaps.  For my selections, I ended up ripping and destemming the rose buds before adding them into the soap base.  My earl grey tea was pulsed in a spice grinder to create smaller bits–not as nice looking as the herbals, but much more effective as an exfoliant.  The buds and leaves of the lavender and green tea were softer and small enough that I didn’t have to alter them in any way.  Tea from tea bags also work well in tea soaps, as the leaves have often been cut and torn into smaller bits.

Without sounding too much like a lady of the backwoods, I’d like to mention that making tea soap is actually an incredibly fun and rewarding craft project.  It’s a fantastic way to use up any leftover teas that are sitting in the back of your tea cabinet or other teas that for some reason don’t please your palette.  Tea soaps make simple party favors, decorative bath accents, or a simple, fresh burst of daily aromatherapy to brighten your day.

DIY Tea Soaps

What You’ll Need:

melt & pour soap base

essential oils/ tea powders ( I used rose, bergamot, lavender, and match green tea powder)

leaf teas or herbals (I used rose buds, earl grey, lavender, and sencha)

soap or silicone molds (just any plastic mold with an inner smooth surface will do)

microwave safe medium or large mixing bowl

spoons for stirring

dough cutter or knife (for cutting chunks off of soap base brick)

tea towel

parchment paper and twine (optional)

Step-By-Step:

1.)  Looking at your soap mold(s), estimate the amount of soap base you will need to fill the molds.  Use a dough cutter or other dull cutting tool to cut off chunks of the soap base.  You can also use a knife to do this, just be careful as the soap can be sticky and slippery to the touch.

2.)  After you’ve cut off the amount of soap base you need, place it in a medium or large microwave safe bowl.  Melt it in the microwave according to the manufacturer’s directions.  For the amount needed for my mini bar soaps I only needed 20-30 seconds in the microwave on high.  The soap base melts readily in the microwave, so melt at 20 second intervals to avoid overheating.  Carefully remove the bowl from the microwave with a tea towel, and stir in 1 tsp of the tea leaves and a 1/2 tsp of the essential oil (or tea powder).  I use these amounts for 1 of my 3″ x 2″ x 1″ soap bars.  You can adjust the amount of tea and essential oil according to how large your mold is.

3.)  With a spoon, mix together the tea leaves and essential oil (or tea powder) until you get an evenly mixed soap.

4.)  Pour the soap mixture into your mold(s), then set them aside until they have completely hardened.  Clean the mixing bowl by running under cold water.  The residual soap will peel off from the bowl.

5.)  After the soaps have completely hardened, pop them out of their molds.  Wrap each bar in a square of parchment paper and tie with twine until ready to use.

Dim Sum Recipe #8: Steamed BBQ Pork Buns (Char Siu Bao)

The number 8 is a lucky one in Chinese culture.  It’s used to indicate fortune, prosperity, and success.  This is a good thing for me, because after much trial and error, I’m happy to bring you lucky Dim Sum Recipe #8 in my series on the highly coveted Chinese tea lunch…Steamed BBQ Pork Buns!  For the longest time I wasn’t successful at making Chinese steamed buns.  My steamed buns would often end up speckled, dimpled, or lopsided…just not right.  With success finally comes the recognizable dim sum treat we know as Char Siu Bao–fluffy buns stuffed with a slightly salty, slightly sweet pork filling that’s always a crowd favorite.

What I aimed to create in a recipe for Steamed BBQ Pork Buns was a supple bun dough where I could easily make baos in 2 ways–one with a perfectly smooth top and the other the traditional way, pleated and pinched with an open top for venting.  This bun dough, based on my recipe for Chinese Fold-Over Buns, easily adapts to either shape and is extremely versatile. You can use it as a base for both sweet and savory fillings, and even enjoy the buns made with it plain.  I have many more ideas and riffs on using this bun dough, so trust me, you definitely haven’t heard the last of it!

The filling I use here is the same filling I use for my Baked BBQ Pork Buns, the buns with a golden, honey-lacquered top that’s sticky to the touch.  One thing I prefer to do for the steamed version of these buns is processing the BBQ pork through a food processor instead of dicing it into cubes.  While high-gluten bread flour is used to make baked buns heartier and chewier, low-gluten Hong Kong flour is used to make steamed buns delicate and airy.  Since the texture of steamed bread is more tender than that of the baked variety, loosening up the texture of the meat to match the bread’s tenderness makes each bite lighter and more harmonious.

I could really use some help with my pleating.  I’ve mentioned in my Ha Gao post that pleating really isn’t my forte.  Luckily, with these Char Siu Bao, poor pleating doesn’t matter. If you want a neater look to your buns, just flip the baos over to reveal a smooth top. Anyhow, steamed pork buns really should be eaten while they are still warm and fresh out of the steamer.  If you are like me and can’t get into a good pleating groove, no worries!  You and your friends will be munching on the steamy pockets before anyone will even notice any of those perfect imperfections.

At Chinese restaurants you will commonly find steamed buns with a square of parchment attached underneath to prevent each bun from sticking to the steamer.  I like to steam my buns in a bamboo steamer lined with one large round of parchment, perforated and cut to the dimensions of the steamer.  Place the baos in colorful cupcake liners immediately after steaming for a pretty and modern look.  The liners will still adhere to the buns but won’t warp as they would if they were cooked with the buns in the bamboo steamer.

If you are looking for a delicious tea to enjoy with these buns, please check out my post on Steven Smith Teamaker’s Spring Harvest blend.  It’s a Chinese Mao Feng green tea that’s fresh and slightly sweet, just like these Steamed Char Siu Bao are!  The two make a delicious pairing, and are perfect served as a light springtime afternoon snack.

Dim Sum Recipe #8:  Steamed BBQ Pork Buns (Char Siu Bao)

Makes 16 small buns. 

Ingredients:

1 batch of Chinese Steamed Bun Dough

1 full recipe of Char Siu Bao Filling

Equipment:

stand mixer with mixing bowl and hook attachment

large whisk

large proofing bowl

plastic wrap

work surface

bamboo steamer

wok with slightly larger diameter than steamer OR a stockpot with exactly the same diameter as the steamer

rolling-pin or scale

parchment, to line steamer

food processor (optional)

large frying pan or wok (for making char siu filling)

large plate

Directions:

1.)  Make 1 batch of Chinese Bun Dough (aka dough for Chinese Fold-Over Buns).  While dough is going through first proofing, make the Char Siu Bao Filling.

2.)  Make 1 full recipe of Char Siu Bao Filling.  If you prefer, process the store-bought/prepared BBQ pork in a food processor until you get a shredded-like texture to the meat, then proceed with Char Siu Bao Filling recipe.  If not, just dice the pork into 1/4 inch cubes and proceed with the filling recipe.  I’ve omitted the chives here as a like a completely reddish looking filling.  You can add chives into the filling if you prefer.  After cooking, place the filling on a large plate and cover with plastic wrap.  Set it aside to cool to room temperature.

3.)  When the first proofing is complete, cut the dough into 16 equal pieces.  You can just eyeball this or use a scale for extra accuracy.

4.)  Form each of the 16 portions of dough into balls, then roll each ball into a 3.5″ flat round. Place 1 Tbsp of the cooled char siu filling in the center of each round, then pleat the edges of the dough round and pinch to seal the top of the bun (see below).  Set finished buns into a parchment lined bamboo steamer (or large plate) about 2″ apart, then cover with plastic wrap and allow the buns about 15 minutes to proof again.  Preferably, proof the buns in a warm, draft free place.

5.)  Meanwhile, fill wok or stockpot with 3-4″ of water.  Set water on high heat and let it come to a full boil.  After the 15 minutes of proofing have elapsed, place the steamers in/on top of the wok/stockpot and cook on high heat for 8 minutes, or until the buns are puffy, fluffy, and risen.

Smith Teamaker’s No. 6 Spring Harvest

Before spring sneaks away from us I want to introduce you to Steven Smith Teamaker’s Spring Harvest.  This blend is made from Mao Feng, a green tea that grows in Zhejiang, China.  As much as I love Japanese green teas for their clean and grassy taste, I think that Chinese green teas tend to have much more depth and complexity in flavor.  This could mean differences in how the tea is grown, how the tea leaf is picked, or how the tea is processed after picking.  In general, the process for creating Japanese green teas is considered more mechanized than the making of Chinese green teas.

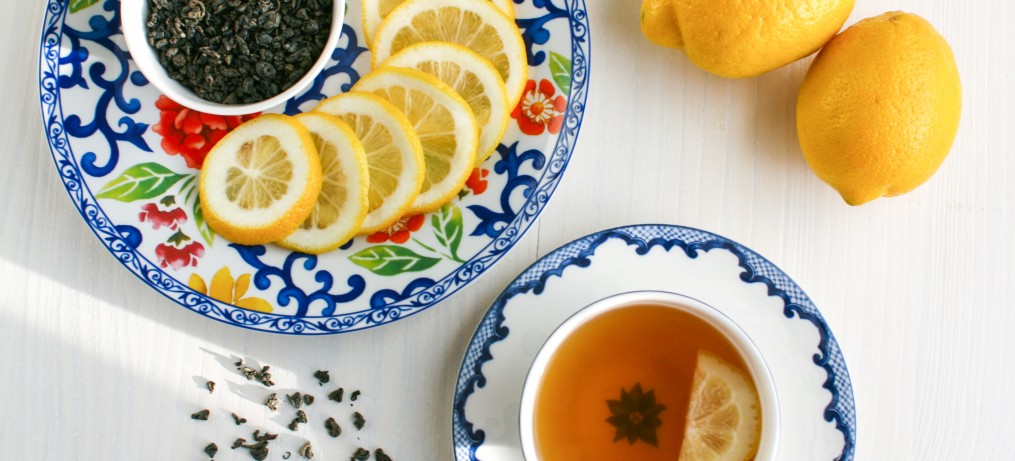
The best word I can use to describe the flavor of Smith’s Spring Harvest is bright.  The brightness of this steep is the result of it having been grown at a high elevation.  It is thought that teas grown at higher altitudes also grow slower, and thus have more time to develop complex flavor profiles.  Even better yet, these high altitude teas are richer in antioxidants!

I also want to tell you something really neat about the Smith Teamaker’s website.  If you buy some of their teas, you will find a batch number at the bottom of each box.  The Smith Tea’s website has a button called the “Batch No. Lookup” in the upper right corner of their homepage where you can discover the origin of the tea, who packed the tea, and date it was packed on.  This is a neat feature for those who want to know exactly how the leaf traveled from tea bush to tea cup!

Tasting Notes for Smith Teamaker’s No. 6 Spring Harvest:

BREWING TIPS:   3 minutes @ 190 degrees F.

THE LEAF:  Full, dark green, twisty tea leaves.

THE SCENT:   Like steamed bok choy or other similar green leaf vegetables.

THE STEEP:  Brews to a very light buttery yellow.  Sweet, fresh, and bright with a nutty finish.

GET IT:  The No. 6 Spring Harvest blend is only available at  Williams Sonoma.  However, at the Smith Teamaker website you will see an option for No. 8 Mao Feng Shui, which is a very similar blend if you’d like to order from Smith Teamaker in Portland, Oregon directly.

FOOD PAIRING:  Char siu bao, also known as Steamed BBQ Pork Buns…the classic Chinese Dim Sum specialty.

Matcha Mango Mochi Rolls

Microwave and mochi may not seem like they belong in the same sentence, but yet here it is…Microwave Matcha Mango Mochi Rolls!  Could there be any more m’s in a recipe?

Traditional Japanese sweet rice cake is made from steamed glutinous rice, which is pounded into a paste and shaped to create the chewy, sticky mouthful referred to as mochi.  As authentic as it is to use a steamer to make mochi, there are many other more convenient methods you can use to make mochi, including the stove top, the oven, and even the microwave!  The microwave an ideal place to cook this treat, as any slight degree of overcooking is masked by the fact that mochi already has a characteristic chewiness about it.

These mochi rolls are the not-as-cold and not-as-sweet version of mochi ice cream.  What’s great about them is that don’t require any fancy filling techniques like those needed when making traditional filled mochi.  I make the Matcha Mango Mochi Rolls as I would cinnamon rolls–just spread a cooked mochi sheet with a layer of mango cream, then roll up, chill, and cut with a sharp serrated knife.  If you’ve allowed the roll a proper amount of time to set up in the fridge, you’ll end up with beautiful mochi slices with specks of fresh mango studded throughout.

I love that something as traditional as mochi can be made so simply in the microwave, within minutes.  For the whipped cream filling, feel free to substitute any fruit that you love…strawberries, peaches, or even bananas will work well.  And if you can’t find the freeze-dried fruit, just add more of the fresh fruit.  The filling can also easily be replaced with canned smooth red bean paste, which results in a much more traditional tasting mochi roll.

Matcha Mango Mochi Rolls

Makes 12 pieces.

Ingredients:

{Mochi Sheet}

4 oz. sweet rice flour (mochiko)

3/4 cup water

1/3 cup sugar

1 tsp vanilla

1/4 tsp baking powder

1 Tbsp matcha powder, sifted

non-stick vegetable oil spray

1 cup dried, unsweetened, shredded coconut

{Mango Cream}

1/2 cup cream

2 Tbsp sugar

1/4 cup freeze-dried mango, ground to a powder in spice grinder

1/4 cup fresh, firm mango, peeled and diced into pea-size bits

Equipment:

microwaveable 9 x 13 rectangular casserole dish

2 medium mixing bowls

rubber spatula

hand-held mixer or whisk

spice grinder

peeler

work surface

large rectangular dish or baking sheet

serrated knife

Directions:

1.)  In a medium bowl, combine mochiko, baking powder, and matcha powder.  Add in water, sugar, and vanilla and mix in thoroughly until you get a homogenous batter.

2.)  Pour batter into casserole dish evenly sprayed with non-stick vegetable oil spray, distributing the batter evenly.  Microwave on high for 5 minutes, or until the mochi sheet is set and a toothpick comes out clean.

3.)  Let the mochi sheet dry to room temperature, then carefully ease out of casserole dish using a rubber spatula.  If it is easier, loosen one half of the mochi sheet, then the other half.

4.)  On top of a work surface, scatter 1 cup of desiccated coconut.  Distribute the coconut evenly into a 9 x 13 rectangle so that the mochi sheet will lay on top of it without making contact with the work surface.  Lay the sticky side of the mochi sheet on top of the coconut. The stickiness of the mochi will cause the coconut to adhere, creating the outer covering for the mochi rolls.

5.)  Make the mango cream by first whipping the heavy cream.  Add the sugar and whip until you get stiff peaks.  Fold in the dried mango powder and the fresh mango bits.

6.)  On the dry side of the mochi sheet, use a rubber spatula to apply an even 1/4″ thick layer of the whipped cream atop the entire sheet of mochi.

7.)  Like you would making cinnamon rolls, take one long side of the mochi sheet, then gradually and tightly roll up until you get a finished, long mochi roll.  Set the roll on a large rectangular dish or baking sheet seam side down, then cover with plastic wrap and set in fridge to chill for at least 2 hours.

8.)  After the roll is properly chilled, remove from the fridge and use a serrated knife to cut out 12 equally-sized pieces of mochi.  Store airtight in the fridge, where the mochi will last 2-3 days.

Writing Process Blog Tour

A few weeks ago, one of my readers, Margie Ann Stanko, invited me to take part in the Writing Process Blog Tour.  I was thrilled to receive her invitation as it was a way for me to learn more about other bloggers and writers, what inspires them to write, and how they go about coming up with new material.  Margie is an interfaith minister based out of New York.  She’s certified in Creative Arts Therapy and helps to support the homeless, the chronically ill, and the elderly.  If you’d like to learn more about her, please check out her site, Funds for Reverence.  Many thanks to Margie for this unique opportunity!

As part of the Writing Process Blog Tour, I’ve been asked to answer a few questions on my writing process…here goes!

1.)  What am I working on?

Right now I’m working on finishing several of my Hawaii-inspired posts.  Hawaii is such a colorful and flavorful place.  I returned from the islands with so many new recipes and topics to cover that I can hardly keep up!  After this, I’ll be getting back to some dim sum posts, which my readers always seem to love.  I’ll also be covering the World Tea Expo in Long Beach next week, where I’ll be meeting up with friends and tea experts, and discovering the latest trends in the fascinating world of tea.

2.)  How does my work differ from others of its genre?

When I mention that I have a tea blog, many people think I’m talking about English afternoon tea–the kind with scones, crustless bread, and cucumber sandwiches.  While I also love the tradition of English tea and do post on some of those classics, my blog specifically covers Asian tea treats, both traditional and modern.  I don’t consider myself a tea expert.  It takes years of dedication, experience, and knowledge to become a bona fide tea educator.  What I do have is an avid interest in tea and a passion for cooking foods with an Asian twist.  I use recipes and food as a way to introduce readers to new ways of enjoying tea.

3.)  Why do I write what I do?

Being Chinese, tea is something that is always around you, all the time.  Almost everyone Chinese is a tea drinker.  This blog was a way for me to bring my passion for tea, cooking, culture, and health into one creative space.  I like to think of tea drinking as an art that joins the East with the West, the ancient with the modern, and the healthy with the decadent.  My friend and author, Bruce Richardson, often refers to tea as the “communal cup.”  It’s so true, tea has the ability to bring people together from all different cultures and backgrounds, which is what I love about it.

4.)  How does your writing process work?

Margie mentioned that a cup of coffee gets things rolling for her in her writing process.  Not surprisingly, for me, a frothy cup of matcha does the same.  As avid tea drinkers around the world know, tea gives you clarity and centeredness–exactly what you need if you are trying to write!  If I have writer’s block, I step away for a while, perhaps to brew another cup of tea or just to get outside into nature to clear my mind.  Another idea I’ve found to be true is that you should always try to write about what you are passionate about.  There is no amount of coffee or matcha tea that can make up for the lack of it.

And now it’s my great pleasure to present two other bloggers (and tea lovers!) that I follow, Beatrice from Shooting Vienna and Brittany from San’in Monogatari:

* Beatrice is the writer behind Shooting Vienna.  She started the blog a year ago because she wanted to push herself to keep moving ahead with her photography.  Her first blog was about food and restaurants in Vienna, but she didn’t want to restrict herself to these themes, and decided to create a new space for more ideas.  Beatrice loves her home city of Vienna and thought that through this blog, she could give readers insight into this lovely city with some random personal posts and a lot of food posts.  Beatrice is a serious foodie…through her beautiful photos, I can eat my way though Vienna’s trendiest bakeries and restaurants!

* In Japan, Brittany is usually called Buri-chan.  Brittany is a CIR in Matsue as part of the JET Program, and has studied Japanese language and culture in earnest since 2005, as well as writing comics for fun.  Her current area of study is now Japan’s San’in region, the often overlooked shadows of ancient Japan. About 1/3 of the Shinto legends recorded in the Kojiki took place in this region, so she has been writing comics about them which make up one component of her blog, San’in Monogatari.  Her comics are incredibly clever and artistic…I often check them out when I am having a bad case of writer’s block!

Please check in with these blogs next week, on May 26th!  On that Monday, Beatrice and Brittany will be answering the same 4 questions about their writing processes.  They’ll also be introducing a few of the blogs that they enjoy following as the Writing Process Blog Tour continues…

Guava Green Tea with Coconut Jelly

On the heels of my Green Tea Jello post this past weekend, comes Guava Green Tea with Coconut Jelly.  Tina, a London-based blogger at The Worktop, dropped me a line the other day wondering if I might have a recipe for Coconut Jelly, the kind you get at boba tea houses sitting at the bottom of your drink.  Coconut Jelly is also one of my hubby’s favorite things to add to his boba drinks, so as the days grow hotter I thought this might be a recipe that you would enjoy as well!

If you’ve been to a boba tea house, jellies are just another option for those who may not want boba tapioca balls in their tea.  To set up the coconut juice and milk, I use agar, a seaweed based gelling ingredient also called kanten in Japanese.  Unlike gelatin, agar is completely plant-based and vegan-friendly.  What’s also great about agar is that it actually sets up at room temperature in much less time than gelatin does, which makes it perfect for warm weather drinks.

I like to lighten up the jelly by using a greater amount of coconut water than coconut milk and by adding a good squeeze of lime juice as well.  This also makes the jelly a naturally harmonious pairing with fruity teas.  If you want even more coconut flavor and have a hammer and some arm strength, crack open a fresh coconut and grate some of coconut meat.  Cut the grated coconut into even smaller bits using a chef’s knife, then throw them into the liquid to boil along with the rest of the ingredients.  And if you want richer flavor, you can switch up the proportions of coconut water and coconut milk (i.e. 1 cup coconut milk to 1/2 cup coconut water).

Thanks again to Tina of The Worktop for inspiring me to make this Guava Green Tea with Coconut Jelly recipe!  Simple and refreshing, there’s no better way to get ready for the summer heat!

Guava Green Tea with Coconut Jelly

Serves 4.

Ingredients:

{Coconut Jelly}

1 cup coconut water

1/2 cup coconut milk

2 tsp lime juice

1/4 cup sugar

1 1/2 Tbsp agar flakes

{Guava Green Tea}

4 cups guava nectar, chilled

4 cups green tea, chilled

Equipment:

medium pot

9×9 baking dish

drinking glasses

fat straws

Directions:

1.)  Throw all of the ingredients (except the nectar and tea) into a medium pot and bring to a boil.  Right when the mixture reaches a full-boil, lower the heat to medium and continue to cook for 5-6 minutes or until the agar flakes have dissolved.

2.)  Pour the hot mixture into the baking dish, then place in the fridge to set (this should take about 15-20 minutes).  You can also just leave the mixture to set at room temperature.

3.)  After the jelly has set, cut it into little square bits (think the size of small peas), small enough to fit through a boba straw.  If you are uncertain, try cutting a piece to make sure it fits through the straw, then follow cutting the rest of the coconut jelly the same size.  Coconut jelly isn’t round like boba are, so they need to be cut into smaller pieces to fit through the straw.

4.)  To make the Guava Green Tea, place 3 Tbsp of the cut coconut jelly in a glass.  Fill the glass half full with chilled guava nectar, then top off with chilled green tea.  Add ice to the tea if you prefer, and don’t forget a fat straw to finish!

Kalua Pork Buns

For a dish that’s so flavorful and simple to make, Kalua Pork should really be on your dinner table tonight.  Kalua pork is a Hawaiian island favorite, traditionally made from roasting a whole pig in an underground oven called an imu, which is filled with burning wood and covered with banana and ti leaves.  When made at home, the Kalua Pork is a no fuss recipe that can easily be made healthier, especially with a secret swap out ingredient.
One of the key ingredients for home cooks making Kalua Pork is liquid smoke.  If you’ve ever used it before you know that it’s some pretty potent stuff.  Liquid smoke is made when smoke from burning hickory is condensed into liquid form.  It’s added to Kalua pork to imitate the taste of burning koa wood, the type of wood traditionally used to cook this Hawaiian specialty.  The problem with using liquid smoke is that it’s extremely assertive in its smokey taste and can easily overwhelm a dish if you don’t using it sparingly.  This is where smokey, savory Lapsang Souchong tea comes into the picture.

The leaves of Lapsang Souchong, a black tea, are dried over pinewood fires which is how the tea gets its characteristic smokiness.  Where liquid smoke is bold, and one-note in flavor, the smokey taste of Lapsang Souchong is gentler and more well-rounded.  The tea’s sweeter notes are reminiscent of the layers of banana and ti leaves that are laid over and around the pork while it is roasting away in the imu pit.  Unlike the oddly concocted process used to get liquid smoke flavoring, Lapsang Souchong gets its smokey flavor when tea leaves naturally absorb their ambient smokey environment.  Its taste is one-of-a-kind and something any tea lover shouldn’t miss.

Although it’s common to use the pork shoulder cut to make Kalua Pork, I’ve made also made this recipe with the leaner pork loin cut with great results.  If you are using pork shoulder, make sure to trim off any and all the visible fat on the outer edge of the meat.  With pork loin you can leave some more of the fat on since it’s such a skinny cut of meat.  If you are interested to see the difference between the two, the first picture of this post shows Kalua Pork from a pork loin cut, and the second photo shows the darker meat from the pork shoulder cut (yes, I made it twice…it’s that easy and that good!).

Pickled Red Onions make the perfect finish for this meaty, luscious braised pork.  The onions add a crunchy, bright bite to the small sandwiches and a beautiful punch of hot-pink color as well.  Stuffed into make-ahead steamed Chinese Fold-Over Buns, Kalua Pork makes a tasty tea snack, easy portable lunch, or unexpected gourmet dinner.

Hawaiian Kalua Pork Buns with Pickled Red Onions

Ingredients:

{Kalua Pork}

3 lb pork shoulder trimmed of all fat on edges or pork loin

2 tsp Hawaiian salt

2 cups brewed Lapsang Souchong tea (2 Tbsp of loose tea brewed for 5 minutes in 212 degrees F water)

{Pickled Red Onions}

1 medium red onion

1 tsp salt

2 Tbsp white sugar

3/4 cup rice wine vinegar

1/4 tsp black pepper

{Chinese Fold-Over Buns}

{Garnishes}

scallions, thinly sliced

cilantro, roughly chopped

Equipment:

crock pot

medium bowl

2 forks

Directions:

1.)  Place trimmed pork shoulder, salt, and tea in the crockpot.  Flip the pork over a few times to distribute the salt evenly, then cover the crockpot with the lid and set on high.  Cook the pork for 3-3 1/2 hours, flipping the meat every hour or so.

2.)  Make the Pickled Red Onions.  Very thinly slice a red onion.  Scatter the salt on the sliced onions and let them sit for 30 minutes.  After 30 minutes, rinse and drain the onions thoroughly under cold water.  Add the vinegar, sugar, and pepper to the onions and mix until the sugar dissolves.  Place the bowl of pickled onions in the fridge to chill for at least 1 hour before serving.

3.)  When the meat is done, it will pull apart easily into shreds using two forks.  Remove any remaining bits of fat, and shred the entire piece of meat.

4.)  Stuff the shredded Kalua Pork into freshly steamed Chinese Fold-Over Buns, then top with Pickled Red Onions, scallions, and cilantro.  Enjoy!

Chinese Fold-Over Buns

Chinese Fold-Over Buns are the naked version of those steamed pork buns that dim sum lovers can’t get enough of.  Having a unique pocket-like shape, Chinese Fold-Over Buns eliminate the need for pre-stuffing buns, which is one of the more complicated steps in bun making.  After a quick steam, these tender pillows are ready to serve with a cooked filling of your choice.

If you want the texture and look of your buns to be similar to the kind you get at a Chinese restaurant, search for some bun flour, also called Hong Kong or bao flour, at your local Asian market.  Hong Kong flour is a flour that’s lower in gluten than all-purpose (AP) flour.  It steams up fluffier, whiter, and brighter than buns just made with plain AP flour.  Look for the flour package that has white, steamed buns on it and you should be good to go.

If you prefer to use all-purpose flour that you can find at a regular American grocery store that’s fine too.  I would suggest making a blend of all-purpose and cake flours, where for every 1 cup of flour in this recipe, you use 3/4 cups of AP and 1/4 cups of cake flour.  This flour blend will give you a bun texture closer to that of Chinese restaurant buns, but they still won’t be as white and fluffy as the buns made with Hong Kong flour.

These Fold-Over Buns actually take to freezing very well.  If you don’t plan on eating them right away, set them aside to cool to room temperature after they’ve been steamed off and then place them in ziplock bags to place in the freezer.  When you are ready to use them later, just remove them from the zip locks and steam until them until they get soft and warm throughout.  You could also warm them in the microwave, but they will get a bit tougher and chewier this way.

And while we are talking about having extra buns stashed in the freezer, here are some more ways that you could enjoy these tender, soft bun pockets:

* Chinese Roasted Duck, Scallions, & Hoisin Sauce (the classic)

* Kalua Pork & Pickled Red Onions

* Store-bought Roasted Chicken & Olive Tapenade

* Korean BBQ & Kim Chee

* Teriyaki Chicken & Pickled Ginger

* Smoked Salmon & Capers

* Cucumber & Herbed Cream Cheese

* Pastrami & Sauerkraut

* Applewood Smoked Bacon & Tomato

* Roasted Turkey & Roquefort Bleu Cheese

* Fried Chicken & Sweet Pickles

* Hummus & Sun Dried Tomatoes

* Black Forest Ham & Gruyère

* Nutella & Strawberries

* Peanut Butter & Grape Jelly

Ok, you get my point. The buns are extremely versatile.  They are the original version of crustless tea sandwich bread!

In my upcoming posts, I’ll be giving you even more ideas on how use this very versatile bun dough.  For today, I’m pairing these beautiful buns with my recipe for Kalua Pork and Pickled Red Onions for a true taste of Hawaii.  My slow cooker recipe for Kalua Pork uses Lapsang Souchong tea to give the luscious meat a gentle, smoky savoriness.  The recipe takes about 5 minutes of real work and then some patience, but the results are totally worth it.

And if you don’t have patience, store-bought roasted chicken can be stuffed into these buns for a tasty and easy meal.  Pair these with a hot, soothing cup of Asian tea and you’ll be enjoying the simplest of gourmet meals.

Chinese Fold-Over Buns

Makes 12 large buns.

Ingredients:

3 1/4 cups Hong Kong flour

3/4 cup water + 1-2 Tbsp more if needed

2 tsp SAF instant yeast

2 tsp baking powder

2 Tbsp non-fat dry milk powder

1/4 tsp fine salt

4 Tbsp powdered sugar

2 Tbsp vegetable or canola oil

extra oil for coating proofing bowl

Equipment:

stand mixer with mixing bowl and hook attachment

large whisk

large proofing bowl

plastic wrap

work surface

bamboo steamer

wok with slightly larger diameter than steamer OR a stockpot with exactly the same diameter as the steamer

rolling-pin or scale

parchment, to line steamer

Directions:

1.)  Using the bowl of a stand mixer, place all the dry dough ingredients into the mixing bowl. Use a large whisk to stir all the dry ingredients together, so that they become evenly incorporated.  Place the bowl in the stand mixer with a dough hook attachment and start to mix on low-speed.  Add the water and oil.  Continue to mix on low-speed.  If the dough isn’t coming together after 3 minutes and looks dry, gradually add 1-2 Tbsp of water until the dough comes together.  Continue to knead the dough on low for an extra 10-15 minutes until the shaggy mass becomes a soft and supple ball of dough.

Pull off a piece of the dough and conduct a windowpane test, where you gently try to pull the dough out into a very thin membrane-like sheet that does not tear.  If you aren’t able to do this easily and the dough breaks apart, continue to knead the dough on low-speed for 2-3 more minutes, then try this windowpane test again.  Passing the windowpane test means that the dough has been sufficiently kneaded.

2.)  Transfer the ball of dough to a lightly oiled bowl to proof, coating all sides of the dough with some of the same oil.  Cover the bowl lightly with plastic wrap.  Let the dough proof in a warm, draft free place for 30-40 minutes or until the mass has doubled in volume.

3.)  After the dough has doubled in volume, punch it down and transfer it to a work surface.  Give the dough a few light kneadings, then roll the dough out into a rectangle, and portion it out into 12 equal pieces (see below).  You can also use a scale if you prefer.  Roll out each of the 12 dough pieces into a ball.

4.)  Place any dough balls that you aren’t immediately using under clear wrap to prevent them from drying out.  Roll each ball into an oval shape about a 1/4″ in thickness (just eyeball it).  Try to keep the thickness of the dough even throughout in each piece.  Fold one half of each oval onto itself to create a half-moon looking bun. 

5.)  Place buns in a bamboo steamer lined with parchment, then cover loosely with plastic wrap.  Let the buns rise for about 15-20 minutes in a warm, draft free place, long enough for them to have just doubled in puffiness.  Meanwhile, fill a large wok or stockpot up with water to a depth of 4″.  Set the water on high heat to reach a full boil.

6.)  Place bamboo steamer filled with risen buns on top of wok or stockpot, place steamer lid on, and steam the buns for about 8 minutes, or until they are light, fluffy, and puffy.  Your Chinese Fold-Over Buns are now ready to be stuffed with a filling of your choice, or you can even eat them plain…enjoy!

PB & J.  You thought I was just kidding, didn’t ya?