Dragon Fruit Blueberry Tea Gummies

The first time I discovered tea flavored gummies I was at Surfas, a true chef’s paradise and my favorite culinary store in Los Angeles. I found myself moseying through the glorious candy aisle, when bam!, there they were: blackberry hibiscus gummy bearstotally over-priced but quite possibly the cleverest tea & food invention around.

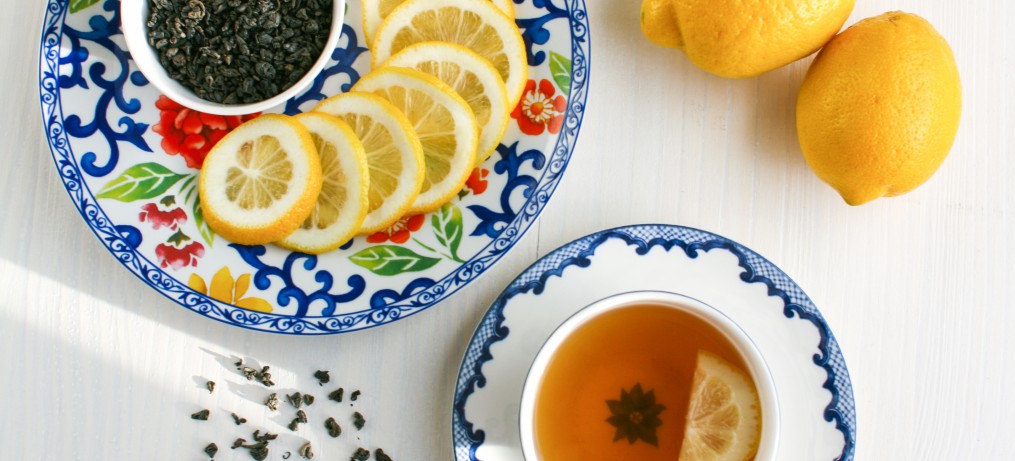
Since that first bag of tea gummy bears, I’ve taken to the kitchen several times to experiment with tea gummy recipes. With the weather heating up this week, I was inspired to make a tropical version of these treats using Tea of the People’s Blueberry x Dragon Fruit Dragon Well Green Tea. This vibrant Lung Ching blend is sweet, tangy, and packed with exotic fruit flavor. You can literally taste the antioxidants and vitamins in the brew, which takes on the most gorgeous shade of ruby-red after a few short minutes of steeping.

My best secret for flavor-packed tea gummies is to steep the tea in juice instead of water. Drop for drop, the candy base will pack equally concentrated tea and fruit flavor. An overnight, cold steep in the fridge produces a brew that’s pure in taste and not cloudy.

I have to admit that I find the shape of dragon fruits to be quite puzzling…attractive, yet rather odd. Dragon fruits actually come from cactus plants. In taste and texture, their flesh tastes a lot like bland kiwi. The color of a dragon fruit’s flesh is either white or hot pink, and is characteristically flecked with small, black seeds. If you’re lucky enough to find one, don’t be scared…try it! That being said, the less adventurous can easily swap out kiwi for dragon fruit in this recipe.

Just like regular gummy candies, these gourmet tea gummies yield a chewy, thick bite that you can really sink your teeth into. If candy molds aren’t your thing, then simply pour the liquid mixture into a baking dish, let it chill, and cut the jelly sheet into small squares. In less than an hour, you’ll be in tea gummy bliss. Guilt-free, antioxidant-packed snacks to munch on whenever you want…there’s lots to love about this adult take on a childhood favorite!

Many thanks to Joshua Caplan, Founder of Tea of the People for sharing his delicious teas with me! Check out the Tea of the People site for more enticing and unique tea flavors, including Acai x Goji Dragon Well and Pomegranate x Yumberry Dragon Wellalso great for making antioxidant gummies.

Dragon Fruit Blueberry Tea Gummies

Makes 5 cups of gummies.

Ingredients:

2 1/2 cups organic blueberry juice (no sugar added)

2 rounded Tbsp green tea (I used Tea of the People’s Dragon Well Green Tea, Blueberry x Dragon Fruit)

3/4 cup gelatin

1/2 dragon fruit or 2 kiwis, skin removed

1/2 cup organic blueberries

1/4 cup agave or honey

1 tsp stevia

non-stick vegetable oil spray

Equipment:

large pitcher

strainer

blender

candy mold or 9 x 13 baking pan

large pot

large glass measuring cup (with a spout)

Directions:

1.)  In a large pitcher, cold steep the tea by combining it with the 2 1/2 cups of blueberry juice. Mix in the tea leaves so that they are able to fully and freely steep. Set this in the fridge to chill for 6-8 hours, then strain the leaves from the juice until ready to make the gummies.

2.)  Purée the 1/2 dragon fruit (the white flesh only, not the tough pink rind) and 1/2 cup of blueberries in a blender on high. Set aside. Mix the gelatin into 1 1/2 cups of the blueberry juice tea, and allow it to bloom.

3.)  Pour the other 1 cup of blueberry juice tea and the dragon fruit-blueberry purée into a large pot and bring it to a boil over low heat. When it comes up to heat, dump the bloomed gelatin into the hot juice-tea-puree mixture and let it gradually and completely dissolve. Turn off the heat, then skim off and discard any foam off the surface of the mixture. Mix the agave and stevia in until dissolved.

4.)  Give the candy mold or baking pan a very light, even spray of vegetable oil. Pour the mixture from the large pot into a liquid measure. Fill each cavity of the mold, carefully pouring directly from the liquid measuring cup. If using the baking pan, pour the entire amount of the mixture from the large pot to the baking pan. Place the filled molds or pan into the fridge or freezer until the gummies are fully set and firm to the touch. In the freezer, it will only take about 5 minutes for the candy mold gummies to set.

5.)  Use your fingers to remove the gummies from their molds. If using the candy mold, repeat steps 4 & 5 as many times as it takes to use up all the tea mixture. If the gelatin tea mixture starts to set in the measuring cup, give it a zap in the microwave for 10 seconds to return it to a liquid state. Store gummies in the fridge in an airtight container.

Matcha Sushi Balls

Sushi rice balls or temari are easily becoming my new favorite tea meal. These colorful rice bites are a twist on ordinary cut sushi rolls, simpler to make (no sushi mat required!) and with an added touch of artistic flair. I love that you can make them using leftover tidbits of this and that, whatever you have on hand in the fridge. Like dim sum or a tea sandwich, they are delightful little delicacies, ideally served with a soothing cup of Japanese tea.

Sushi balls can be made with host of pre-prepped ingredients like lunch meats, cocktail shrimp, or even thinly sliced sushi grade fish. Here, I’ve used smoked salmon, which is easy to find and enhances the rich umami taste of the matcha flavored rice. Eaten together this way, you can taste the best of flavors from land and sea.

For vegetarian variations, you’ll want to showcase the beauty of your produce as much as possible. A cluster of carefully sliced green onions, thin pieces of ripe avocado, or vibrant orange carrot cut-outs add flavor and visual flair to your sushi game. Even Western ingredients like cheese, capers, and sliced olives make pretty embellishments.Above all, remember that creativity is key when making temari sushi. Try selecting colorful ingredients that are easily molded around the rice ball, not too bulky or too large. If you like your sushi more on the traditional side, you can nix the matcha power and make the rice balls plain, seasoned simply with sweetened rice vinegar. These crafty homemade sushi are ideal for parties, bento lunches, or even a romantic dinner. Serve them with emerald green gyokuro, grassy sencha, or caffeine-free soba cha and your artful Japanese tea meal is complete.
Matcha Sushi Balls

Makes 20 rice balls. 

Ingredients:

{Seasoned Rice}

2 cups sushi rice

3 cups water

2 Tbsp rice vinegar

1 1/2 Tbsp sugar

1 tsp salt

2 tsp matcha

{Toppings}

a few slices of smoked salmon

capers

furikake

avocado

masago or caviar

cocktail shrimp, halved down the spine

black sesame seeds

Equipment:

rice cooker or medium pot with cover

small pot

small sifter

wooden spoon

plastic wrap, a piece the size of a sheet of paper

small bowl of cold water

large plate or baking sheet

2 Tbsp cookie dough scoop

sharp paring knife, kitchen scissors, or mini vegetable cutters

Directions:

1.)  Place the rice in the pot, then wash it several times until the water runs clear. Drain off the water from the rice, then add the 3 cups of water. Cover the pot and bring the water to a boil. Reduce the heat, then let the rice cook for 20 minutes on a low simmer until all the water is absorbed.

2.)  While the rice is cooking, prepare the seasoned vinegar. Warm the vinegar, sugar, and salt in a small saucepan until the sugar is dissolved. Set aside.

3.)  When the rice has absorbed all the water, let it sit for 5 minutes, then add the sweet vinegar seasoning. Sift the matcha over the hot rice, then gently incorporate it with the wooden spoon.

4.)  To make the rice balls, dip the ice cream scoop into a bowl of cold water, then scoop out the seasoned rice onto a large plate or baking sheet. For the sushi balls to all be the same size, pack the rice into the scoop and level it off.

5.)  Place the toppings on each rice ball. Use a sharp paring knife, kitchen scissors, or mini vegetable cutters to cut the toppings into pretty shapes. The toppings you add at this point will end up lying flush against the surface of the rice ball. Shape the rice balls by placing one in the center of a piece of plastic wrap lightly damped with water. Use the plastic wrap to mold the topping against the rice ball, using your hand to create a smooth surface.6.)  Remove the rice ball from the plastic wrap and place on a serving platter. At this point, you can finish the temari with delicate finishes like capers, masago, furikake, or sesame seeds. Repeat steps 4-6 to create 20 sushi balls…enjoy!

Hazelnut Butter Mochi

Like many mochi lovers, every now and then I have to get my mochi fix in. After posting about MochiCream over the weekend, the urge to make some of these chewy, pillowy treats was more than I could resist.

What started out as a recipe to use up the last can of sweet red bean paste hiding in the back of my pantry soon took a turn for the delicious when a jar of hazelnut butter caught my eye. Could I fill my mochi with hazelnut butter? Sure I could…and the results were amazing!I ended up using Justin’s, a brand of hazelnut butter with less sugar than the more popular brand of Nutella. The consistency of this nut butter is closer to that of a red bean paste–thicker, less goopy, and better able to hold it’s shape.

If you wanted to used Nutella for this recipe, no prob: simply spoon it out in round blobs onto a sheet of parchment paper. Place them into the freezer to harden ahead of time, and when it’s time to stuff the mochi, you’ll have a neat little balls of goodness to wrap into the cooked rice dough. 
Despite my efforts to make mochi making neater, and the end of the day, it’s a truly messy affair. If you’ve ever worked with powdered sugar or cornstarch before then you’ll know what I’m talking about.

My best recommendation for making these is to wear white, from head to toe. If you are dressed in black (like I was) you’ll be looking like a hot mess post-mochi making. Luckily, nobody will care if you hand them one of these nutty, chocolately rice cakes to munch on before they can say anything! Serve them with a cup of Chocolate Pu’erh from Chambre de Sucre for a rich pairing. 

Hazelnut Butter Mochi

Makes 15 pieces.

Ingredients:

8 oz mochiko (sweet rice flour)

1 can coconut milk

1/4 cup water

1/2 cup white sugar

1 Tbsp vanilla

1-16 oz jar chocolate hazelnut butter (I used Justin’s)

katakuriko (potato starch), for dusting work surface

non-stick coconut or vegetable oil spray

Equipment:

medium bowl

whisk

rubber spatula

microwaveable 9 x 13 rectangular casserole dish

sharp knife

large work surface

1 1/2 Tbsp measure

15 mini cupcake liners

Directions:

1.) In a medium bowl, combine the mochiko, coconut milk, water, sugar, and vanilla and whisk thoroughly until you get a homogenous batter.

2.) Pour batter into a casserole dish evenly sprayed with non-stick oil spray. Distribute the batter evenly. Uncovered, microwave the batter on high for 1 minute at a time, stirring and mixing the batter in between each minute until it becomes a semi-translucent dough. When the dough is finished it should not look powdery or whitish at all. In this step you are cooking the rice flour, looking for the rice dough to be homogenous and cooked through. My dough took about 7 minutes to cook through. Spoon this blob of cooked rice flour dough on to a work surface generously dusted with katakuriko.

3.) Divide the dough into 15 equal pieces using a sharp knife. The dough will be hot, so be careful.

4.) Dust each piece with katakuriko to prevent them from sticking to one another.

5.) To make the mochi, roll one piece of the dough into a ball. Flatten the ball into a round disk, about 3 1/2″ across. Spoon 1 1/2 Tbsp of the hazelnut butter into the center of the disk, then pinch the opposite edges of the disk together to seal the mochi.

hazelnut butter mochi 10

6.) Flip the sealed mochi over to reveal a smooth, rounded top. Repeat this process to make 15 stuffed mochi. Place the pieces into small cupcake liners for easy serving. Mochi are best eaten within a day or two, and can be stored at room temperature. 

London Fog Latte

Did anyone catch the season premiere of Downton Abbey on Sunday? I must admit, I’m a fan of the series, not just for its clever allusions to tea culture (milk in first or milk in last?) but also for its gorgeous countryside scenery and period costumes. And of course, there’s that adorable tail-wagging golden lab who starts off every episode on a cheery note of anticipation.
This London Fog Latte is my go-to treat whenever I settle in to watch an episode of Downton Abbey. It’s elegant, easy to whip up, and tremendously satisfying even after seeing all those scrumptious servings of tea and cake shown on the series. This luxurious latte has a thick layer of frothy vanilla soy milk laying atop best quality, strongly brewed Earl Grey tea. Vanilla and a touch of raw sugar make it decadent without being too rich. Trust me, Starbucks has nothing on this one.

If you can find some vanilla bean paste, this is the perfect time to use it. This dark syrup is flecked with tons of vanilla seeds, which add a caramel-like richness to the brew, pure and fragrant. Many tea experts believe that the proper way to drink tea is with the milk in last, so that you can assess the tea’s color, aroma, and strength before making any changes. If you end up enjoying these London Fog Lattes as often as I do, then you can put that refined custom into practice. London Fog Lattes..brew them strong, brew them classy!

London Fog Latte

Makes 1 latte.

Ingredients:

1 cup boiling water

2 rounded tsp best quality Earl Grey tea (I used Fortnum & Mason’s Earl Grey Classic)

1/2 tsp vanilla extract

raw cane sugar cubes or Demerara sugar, to taste (I used 4 cubes of La Perruche for 1 latte)

1/2 cup vanilla soy milk, or slightly more to taste

1 tsp vanilla bean paste, for drizzling on top (optional)

Equipment:

kettle or water boiler

teapot and strainer

large glass mason jar with lid

spoon

mug

Directions:

1.)  Pour a 1/2 tsp of vanilla extract into the mug.

2.)  Brew the tea for 5 minutes. While the tea is brewing, pour milk into the mason jar, then cover with lid and shake vigorously until the milk is frothy and bubbly, almost doubled in volume. Remove the lid and set it aside. Place the uncovered jar of milk to heat in the microwave on high for 30 seconds.

3.)  Pour and strain the tea into the mug until it is half full. Mix sugar into the hot tea to taste, remembering that the milk is following. Top the cup off with the frothy milk, then drizzle the top of the latte with vanilla bean paste and serve immediately.

Hibiscus Kombucha Blush

Here’s a fizzy drink to jump start your New Year’s on a slightly healthier note. These Hibiscus Kombucha Blush Cocktails are made from 3 simple ingredients and take just minutes to make. They’re perfect for the short-on-time host or hostess getting ready to celebrate the ball drop tonight. Ready or not, 2015 is here, so there’s no time to waste!What I love about this Hibiscus Kombucha Blush is that it’s effervescent, fresh, and not too sweet. The concoction gets its soft, rosy hue from fermented hibiscus tea and strawberry purée. Both can be found in the fridge section of your health food store or even in a well-stocked ordinary grocery store.

If you want to transform this cocktail into a mocktail, feel free to swap out the prosecco with sparkling apple cider. Either way, you’ll experience a tart pop of fizz balanced by fruity sweetness.Get a head start on your January detox regimen with a beautifully pink Hibiscus Kombucha Blush. The invigorating combination of probiotics, vitamins, and a touch of bubbly will keep you going well into the night. And if you are holding off on detoxing, enjoy these light cocktails with New Year’s Day brunch, along with a few flakey Matcha Croissants. Cheers! Looking forward to seeing you in 2015!!

Hibiscus Kombucha Blush

Makes 1 cocktail.

Ingredients:

prosecco, sparkling wine, or sparkling apple cider, chilled

hibiscus kombucha (I used GT’s Kombucha Hibiscus No. 7), chilled

strawberry purée (I used Odwalla’s Strawberry C Monster Smoothie), chilled

organic strawberries, for decorating glass (optional)

Equipment:

cocktail glass

Directions:

1.)  Fill the glass 1/4 full with the strawberry purée, then to the 1/2 fill line with hibiscus kombucha. Top the glass off with prosecco. Decorate the glasses with scored strawberries and enjoy!

Matcha Croissants

Trips to the gym, calorie counting, eating plenty of veggies…before the new year officially begins, I thought I’d give you a final hoorah, something to cap off the holidays with a bang. There has to be a good reason for making croissants, as they certainly aren’t your everyday kind of bread roll. I make these babies once in a blue moon, and celebrating the end of 2014 is a good enough reason for me. Making croissants requires time, patience, and a gentle touch. And, as any baker who has made croissants before knows, the frigid December air makes the process that much easier.

The first time I made croissants was in pastry school. I remember the day clearly as it was one of the main reasons I enrolled in classes. It’s a good thing I did too, because croissant making is really hard to learn from text, and even harder to explain. The process of creating a laminated dough can be thrilling for a baking enthusiast, but only if you feel like it’s something you can learn without getting overwhelmed.

There’s one simple addition that makes a croissant go from pale butter yellow to earthy leaf green, and that’s a good quality matcha powder. The matcha gets incorporated into the flour-based part of the croissant dough or dètrempe, not the beurrage, or butter block.

One full recipe of this dough makes 32 crispy, flakey mini matcha croissants. If you like variety, then divide the dough up to make both regular (16) and chocolate croissants (12), which are a bit larger than the plain kind. If you want to enjoy every croissant fresh out of the oven, you can easily freeze the croissants after shaping them. Simply freeze them after they are parked on the baking sheet. When they’ve hardened, place them in airtight bags in the freezer so that you can bake them up whenever you’re in need of a tea break.

The matcha actually makes the croissants taste more savory, so these are ideal for creating tea sandwiches like smoked salmon or turkey tarragon. My favorite way to enjoy these matcha croissants is plain and simple, with a dab of some sour raspberry jam and a cup of light, frothy matcha on the side. Serve them for New Year’s brunch as a delicate and decadent way to finish off the holiday season.

Matcha Croissants

Makes 32 plain or 16 plain & 12 chocolate.

Ingredients:

{Dough- Dètrempe}

1/2 cup water, warm for activating yeast

1 Tbsp active dry yeast

3 1/2 – 4 cups all-purpose flour

3 Tbsp matcha powder (I used Mizuba Matcha)

1/3 cup sugar

1 Tbsp salt

1 cup whole milk, at room temperature

bench flour

egg wash, one egg beaten with 1 tsp of water

{Butter- Beurrage}

12 oz butter, slightly colder than room temperature (stiff but not hard to the touch)

2 Tbsp all-purpose flour

{Extras}

semi-sweet chocolate chips

Equipment:

small bowl

stand mixer with large bowl and dough and paddle attachments

plastic wrap

large plastic zip bag

large work surface

rolling-pin

pastry brush

sharp knife

18″ ruler

2 large baking sheets, fitted with parchment paper

Directions:

1.)  In a small bowl, combine yeast with warm water. Set this aside for a few moments to activate the yeast. In bowl of stand mixer fitted with dough attachment, add the proofed yeast mixture and 1 cup of milk. With the mixer on low, gradually add 3 1/2 cups of flour, matcha, sugar, and salt. Mix for 1-2 minutes until a soft dough is formed. If the dough looks too moist and is sticking to the bottom of the bowl, add 1 Tbsp of flour at a time until the dough doesn’t stick to the bottom of the bowl. You may need to add up to a total of 4 cups of flour. Set the mixer to high and mix the dough until it is smooth, elastic, and no longer sticky. This should take about 4 minutes. The dough should be the consistency of soft butter.

2.)  Cover the dough with plastic wrap completely, then place it into a large plastic zip bag and seal tightly. Leave at room temperature to sit for 30 minutes to allow for the gluten to relax.

3.)  To make the butter block, clean the now used/empty mixing bowl, then attach the paddle attachment to the stand mixer. Beat the butter and flour on high speed until you get a smooth consistency similar to the croissant dough you just made. Make sure there aren’t any lumps. If there are, smash them out with your fingers. Place this butter-flour mixture on a large piece of plastic wrap and cover completely.

4.)  With your hands, mold the plastic covered butter into a rectangle that is 5″ by 6″, and about 1″ thick. Try to slap out any air from the butter block. Place in the fridge to chill until needed.

5.)  On a lightly floured work surface, roll the croissant dough to a rectangle 10″ by 16″. Brush off any excess flour from the dough’s surface with the pastry brush. Place the chilled butter block into the center of the rectangle, with the short side of the butter facing the long side of the dough.

6.)  Start to make brochure-like folds by first folding in the left side over the butter block. Again, brush off any excess flour with the pastry brush.
7.)  Now fold the right side of the dough over the center to create a brochure looking dough package. Again, brush off any excess flour.

8.)  Rotate the dough package 90 degrees to the right. Use the rolling-pin to lightly press the dough into a 10″ by 16″ rectangle again. Be gentle, patient, and kind to the dough. Press the rolling-pin down to make impressions rather than using a strong rolling motion. Try not to roll over the edges as that may cause the butter to leak out.

9.)  When you achieve an 10″ by 16″ rectangle again, fold the left and right sides in towards the center, to create a 3 layered brochure again. This is your first turn, hence you can place one finger impression in the dough (I placed in upper right). Now cover the dough with plastic wrap, then place this brochure-like rectangle into the fridge to chill for 30 minutes. Repeat this process 3 more times for a total of 4 turns, covering the dough with plastic wrap and refrigerating for 30 minutes in between each turn.
matcha croissants 1510.)  After 4 turns, make sure to chill the dough for 30 minutes again.

matcha croissants 16

11.) Divide the dough into 4 pieces. Each piece gets rolled into a 7″ by 18″ rectangle. Work with one piece at a time, refrigerating the other pieces until you are ready for them. matcha croissants 1712.) Roll one piece of the dough into a 7″ by 18″ rectangle, trimming off sides with a sharp knife to create clean edges. Mark the dough every 2 inches using a ruler and knife. Cut lines connecting the marks to create 8 full triangles (and two-half triangle scraps at each end).

13.)  For each triangle, score the center of the base about 3/4″ in to create an Eiffel Tower looking piece of dough.

14.)  Roll the base of the Eiffel Tower up towards the tip to create a finished croissant. Push the ends in to create a crescent shape. Make sure the tip is tucked under so that it doesn’t puff up during baking.

15.)  Place the finished croissants (8 to a pan) on a large, parchment lined baking sheet. Uncovered, let them proof for about 2 hours at room temperature. When ready, brush with egg wash, then bake in a pre-heated 350 degree F oven for 12-15 minutes or until puffed and golden brown. Repeat steps 12-15 to make another set of plain matcha croissants.

16.)  To make chocolate croissants, roll a piece of dough out (from step 11), again into a into a 7″ by 18″ rectangle, trimming off sides with a sharp knife to create clean edges. On the top and bottom of the long sides of the dough, mark the dough every 3 inches using a ruler and knife. Cut lines connecting the marks to create 6 long rectangles.

17.)  Place some chocolate chips at the bottom of one rectangular dough piece. Roll it up in a sushi roll like fashion, sealing the top edge with a brush of egg wash.

18.)  Place the chocolate croissants (6 to a pan) seam side down on a large, parchment lined baking sheet. Use the palm of your hand to slightly smash the roll down so that it lays like a pillow. Uncovered, let them proof for about 2 hours at room temperature. When ready, brush with egg wash then bake in a pre-heated 350 degree F oven for 12-15 minutes or until puffed and golden brown. Repeat steps 16-18 for another set of chocolate matcha croissants.

Gingerbread Teacup

Just like that and Christmas is tomorrow! The last week has been so utterly hectic. Last minute trips to the mall, mad gift wrapping, and anxiously waiting for the UPS guy to show up with my deliveries has left me in serious need of a tea break. I’m sure you could use a break too, so here is my offering to you during this eventful holiday season: a Gingerbread Teacup–quaint and cozy–just in time for time for the big day tomorrow.
Last week I made a gingerbread house for my niece Maddy. With the spicy dough, I created heart-shaped windows, a deeply sloped roof, and a slender chimney that you could almost imagine smoke whispering out of. That’s the thing about gingerbread…it’s like playing with molding clay–ideal for those who like creating art out of food. The whole process got me thinking of how to shape gingerbread, especially since I’ve been meaning to finally put my brand new Sports Ball Pan Set to use. Sports ball? We can do better than that!

What’s great about the Sports Ball Pan is that it’s divided into 2 hemispheres, the perfect depth for a deep yet shallow teacup. To combat the gingerbread dough’s tendency to want head south while baking (because of the molasses and butter in the dough), I freeze the shaped tea cup dough before baking it. I also use the other empty hemisphere of the mold to compress the dough from the top to help create an even thickness along the lip of the cup. For maximum versatility, it’s also important to use a dough recipe that can tolerate some cutting with a serrated knife after being baked.

After baking off the tea cup piece, you’ll notice that the inside bottom of the teacup is thicker than the sides. This is simply a result of gravity doing its work during baking, so don’t worry! The cup is designed to be filled with lots of small edible goodies, so a thicker base means a sturdier base.

I’ve also tinted my royal icing with cocoa powder and cinnamon so that it looks like the color of the dough itself. This isn’t typical in gingerbread house making, but a good idea here since we want the tea cup pieces to come together to look continuous and smooth. The cocoa colored icing is used to attach the rim of the tea cup, which is simply made from creating a ring of gingerbread dough based on the diameter of the sphere.

My sweet friend Danielle from This PictureBook Life bought me some yummy little Green Tea Kit Kats when she stopped over at Hello Kitty Con in Little Tokyo, so I thought this would be the perfect time to use (and eat!) them. You could certainly make your own tea-infused treats like Homemade Green Tea Pocky or Lemon Matcha Cake Bites, but if you’ve already made the cup, you should probably take a break now.

Truffles, biscuits, or even a pile of individually wrapped tea bags will steal the show in this homey little cup. Gingerbread Tea Cups: drink the tea, eat the cups! I’ll be taking this treat display over to my UK blogger friend Justine’s site for her Special Christmas Tea Time this week–you should come too! And with this post, I’d like to wish you a very Merry Christmas and send out a big thank you for following me along on my tea adventures this year! Happy Holidays everyone!!

Gingerbread Teacups

Makes 2 cups.

Ingredients:

{Gingerbread Dough}

1 cup unsalted butter, at room temperature

1 1/4 cups light brown sugar

2 eggs, at room temperature

2 tsp fresh ground ginger

2 tsp vanilla extract

1 cup molasses

2 tsp cinnamon

2 tsp ground ginger

1/2 tsp cloves

1 tsp baking soda

1/2 tsp salt

5 cups all-purpose flour

bench flour

{Royal Icing}

1 1/2 sifted confectioner’s sugar

2 Tbsp sifted cocoa powder

2 tsp cinnamon

2 tsp powdered egg whites

2 Tbsp water

{Embellishments-optional}

small piece of red fondant

small heart-shaped cookie cutter

candies or cookies for filling the tea cup (I used green tea Kit Kats)

sugar cubes

teaspoons

Equipment:

stand mixer with paddle attachment

rubber spatula

large mixing bowl

large work surface

rolling-pin

sharp knife

ruler

7″ plate or other circle to use as template

large baking sheet fitted with parchment

large spatula, for handling hot gingerbread

cooling rack

sports ball baking pansprayed with non-stick spray on the inner surface of one hemisphere, and the outer surface of the other hemisphere

serrated knife

medium mixing bowl

plastic piping bag

scissors

Directions:

1.)  Make the Gingerbread Dough. Cream butter and sugar together in the bowl of stand mixer on low. Meanwhile mix the cinnamon, ground ginger, cloves, baking soda, salt, and flour together in a large bowl. Add eggs, one at a time, to the creamed butter, mixing thoroughly after each addition. Use a rubber spatula to scrape down the sides of the bowl, then add the fresh ground ginger, vanilla, and molasses and continue to mix on low. Gradually add the spiced flour to the creamed butter until the dough is thoroughly mixed together. Place the dough on a large piece of plastic wrap, slightly flatten and seal tightly, then place the dough in the fridge to chill for at least 2 hours before rolling.

2.)  Shape the Teacup. After the dough has chilled, divide it in half, then roll one piece of the dough out to 1/8″ thickness with a rolling-pin on a large work surface generously dusted with flour (leave the other half covered in plastic wrap in the fridge). Roughly cut out a 10″ circle, then gently lay this piece of dough into one half of the ball baking pan (the hemisphere with the inner surface greased). Fit the dough into the pan as if you were laying pie crust into a pie plate, making sure the dough fits snugly and evenly against the ball pan. If there are tears, carefully patch them with scraps of dough. Trim off excess dough laying over the edge of the pan with a sharp knife. Place the mold fitted with the dough into the freezer to freeze until solid.

3.)  Create a Handle. Cut out a 1/2″ by 5″ strip of dough from the rolled dough. Shape it into the shape of a half heart, then place it on a large baking sheet.

4.)  Create a Tea Cup Rim. Cut out a 6″ round (using the empty hemisphere), then cut out a 5 1/2″ circle inside of the dough cut-out, creating round ring. Carefully transfer this dough ring to the baking sheet.

5.)  Create a Plate. On the rest of the rolled dough (or scraps re-rolled to 1/8″ thickness), place a 7″ plate. Cut around the plate with a sharp knife to create a gingerbread plate. Transfer this 7″ round of dough also to the large baking sheet. Lightly press the bottom of one of the ball molds into the center of the round to create a “ditch” for the teacup to sit in later. Place this plate also on the baking sheet.

6.)  Bake Cup, Handle, Rim, and Plate. Pre heat oven to 375 degrees F. When the oven comes to temperature, Place the dough teacup into the oven, with the other greased half of the mold (the empty hemisphere, greased on the outside) pressed snugly against the top surface of shaped dough. This will help the dough to create stronger “sides” on the teacup. Bake the shaped teacup dough for about 15 minutes, then remove the top pan and bake for an extra 12-15 minutes until the gingerbread is slightly puffed and stiff to the touch. Bake the handle, teacup rim, and plate for about 10 minutes until the handle is slightly puffed and stiff to touch, then remove the handle and continue cooking the teacup rim and plate until they are also finished baking. You may need to take the rim out at a different time than the plate so that the gingerbread doesn’t burn. Place any finished pieces of gingerbread on a cooling rack to cool. For the teacup, let it cool while it is still sitting in the ball pan.

6.)  Trim the Gingerbread Tea Cup and Handle. When the gingerbread tea cup pieces have fully cooled, use a serrated knife to create clean, flat edges. For the tea cup, trim the jagged upper edge so that it lays flush against a flat surface when turned upside down.

Trim the half heart-shaped handle to fit flush against the side of the teacup. It’s best to trim just a bit at a time as you see necessary.

Repeat steps 2-6 to create a second set of teacup pieces.

7.)  Make the Royal Icing. Mix all the icing ingredients together in a medium bowl, then place the icing into the piping bag. Cut a small edge off from the bag’s tip, then use the royal icing to glue the handle to the teacup, and the teacup base to the plate. Also attach the tea cup rim to the top of the teacup, wiping off any excess icing with your finger to create a clean appearance.

8.)  Attach Tea Cup Embellishments. You can make small heart-shaped gingerbread cookies from re-rolled scraps. Also, you can roll out a small piece of red fondant and then cut it using a decorative cookie cutter, attaching it to the teacup with a dab of icing. Fill the teacup with cookies or candies. Sugar cubes and teaspoons also make charming finishes. 

Dim Sum Recipe #11 : Vegetable Egg Rolls

If you’ve followed along for a while, I’m guessing that you probably love dim sum as much as I do. Since dim sum tends to be a fat laden meal, I often try to make these treats a bit healthier when creating them at home. I figure that you can get the full-fat version at your local dim sum house, and then come back to my recipes when you feel like cutting back a bit.

I’m happy to say that I’ve been able to avoid deep fat frying in my dim sum recipes up to this point. When I finally get around to covering even more dim sum favorites I don’t know that I’ll be able to hold to this, but for now I’m happy to say that these Baked Veggie Egg Rolls are every bit as delicious as the originals. Instead of deep fat frying, these rolls are wrapped with a phyllo pastry that’s lightly misted with oil spray. Less fat, lots of fresh veggie flavor, and no used oil clean up…what’s not to love?

There are a few tricks to creating a perfectly crisp baked egg roll. First, you want to pick veggies with less water content. For this reason, I like to use regular cabbage instead of napa cabbage and dried shiitake mushrooms instead of fresh ones. When you cook the filling over high heat, the goal is to reduce the water content in the veggies, which also helps to concentrate their flavor.

Another thing you’ll want to do is to make sure the filling is completely cooled to room temperature before wrapping it with the phyllo. This is a very important step since steam coming off of the cooked veggies will sog up an otherwise crisp wrapper.

My last tip (and this is an easy one), is to eat these while they’re still freshly baked. You can keep the phyllo and veggie filling in the fridge, and just make the number of rolls you plan on eating when the time is right. This assures a crisp, golden crust that shatters, just like what you’d expect in the most delicious deep-fried kind. Serve these up with some oolong tea based Sweet & Sour Sauce and poof! Chinese take-out night without the guilt!

Dim Sum Recipe #10: Veggie Egg Rolls

Makes 12 egg rolls.

Ingredients:

{Egg Rolls}

2 Tbsp vegetable oil

1 medium brown onion, diced (1 cup)

1 Tbsp garlic, finely chopped

2 tsp ginger, grated

1 oz dried shiitake mushrooms, rehydrated, rinsed, squeezed dry, stems removed, then diced

1 Tbsp sherry or cooking wine

2 carrots, shredded (1 1/4 cups)

1 red bell pepper, diced (1 cup)

1/2 small head of cabbage, diced (5 cups)

1 tsp sesame oil

1/2 tsp white pepper

1 tsp sugar

3 Tbsp vegetarian oyster sauce

2 green onions, sliced finely

12 large sheets of phyllo dough, thawed and kept moist

vegetable oil spray

{Orange Oolong Sweet & Sour Sauce}

Equipment:

large wok or skillet

large baking sheet

large cooling rack

work surface

1/4 cup measure

Directions:

1.) Place a wok on high heat. Add the vegetable oil to the pan, wait for it to shimmer, then add the onion, garlic, and ginger to the pan and cook for 1 minute. After a minute, toss the diced mushrooms into the pan with the onion, garlic, and ginger, and stir fry for 2 minutes.

2.) Add 1 Tbsp of sherry to the cooking vegetables, then let it cook out.

3.) Next add the shredded carrots and diced red bell pepper. Stir fry them with the mushroom-onion mixture for 3 minutes, then add the diced cabbage to the wok.

4.) Stir fry the vegetables for about 3 minutes, then add the sesame oil, white pepper, sugar, and vegetarian oyster sauce. Continue to cook the mixture over high heat for an additional 4 minutes until all the excess moisture has evaporated and the veggies are slightly browned. Place the vegetable filling on a large plate to cool completely to room temperature.

5.) When the filling has completely cooled to room temperature, mix in the green onions with the veggies, then preheat the oven to 425 degrees F.

6.) Place a sheet of the phyllo on a work surface, then spray it lightly and evenly with vegetable oil spray. Place 1/4 cup of the veggie mixture on one side of the phyllo sheet (my sheet was 9″ x 14″), about 1″in from the edge on the short (9″ side). Form the filling roughly into a 4″ log. Fold in the long (14″) sides of the pastry evenly around the filling, then roll the egg roll up in a sushi-like fashion, until you a finished egg roll. Repeat this step 12 times to make 12 egg rolls.

7.) Lightly spray a large baking sheet with the same vegetable oil spray, then park the egg rolls on the baking sheet seam side down. Give each egg roll a final even, light spray of oil, then bake them for about 10 minutes until golden brown and crisp.

8.) Let the Baked Veggie Egg Rolls cool on a cooling rack for a few minutes, serve them with Orange Oolong Sweet & Sour Sauce on the side, and enjoy!

Chai Teacup Pies

Butterball soaking in the tea brine? Check!

Sweet potatoes roasted? Check!

Spinach triple-washed? Check, check, check!

There’s one item I haven’t touched yet, and that’s dessert. Since I’ll be using a super simple and healthy recipe this year, I’m putting it as last on my to-do list before the Thanksgiving festivities begin.
I’m committed to making Thanksgiving super healthful this year, and by super healthful I mean less butter, less salt, and tons of herbs, spices, and of course…tea! My recipe for Chai Teacup Pies is adaptable to both apple and pumpkin variations. The recipe switches up the ratio of filling to crust, where elegant teacups becomes your easy-to-serve crust replacements.

You’ll want to use oven-safe teacups to make these teacup pies. Many contemporary teacups are perfect for the job, so just make sure not to use your fine porcelain china here. A leaf-shaped cookie cutter helps to cut out rustic pie crust cookies, so that you get just a touch of flakey richness without feeling deprived. A store-bought pie crust will work just fine…BUT if you make your own killer crust like my friend and award-winning pie maker, Sue over at Birgerbird does, you’ll savor each delectable leaf that much more!

If you prefer the apple pie version of this recipe, simply use the filling from my Crisp Apple Strudel recipe. Triple the recipe and swap out the spices with your favorite chai tea powder, adjusting the amount of tea powder you use to taste. And with that, I’d like to say good luck to all the cooks out there tonight! With so much to do and so little time left, these super easy Chai Teacup Pies might be just the dessert to call it a day with!

Chai Pumpkin Teacup Pies

Makes 6-8 teacup pies, depending on size of teacups

Ingredients:

3 1/2 cups pumpkin purée (1 large can Libby’s)

2- 12 oz cans evaporated milk

1 1/2 cups brown sugar

4 Tbsp chai tea powder (preferably sugar-free like David Rio or Blue Lotus, adjusting to taste depending on brand)

1/2 tsp salt

2 tsp vanilla extract

4 eggs

egg wash or cinnamon (optional)

Equipment:

6-8 large oven-proof teacups

large mixing bowl

whisk

ladle

large leaf cookie cutter or sharp knife

large baking sheet

another large baking sheet fitted with parchment

Directions:

1.)  Preheat oven to 375 degrees F. Whisk all of the filling ingredients together in a large mixing bowl. With a ladle, fill the teacups until just over 3/4 full.

2.)  Park the teacup pies on a large baking sheet and bake teacup pies for about 50 minutes, until the pie filling is set in the middle and slightly puffed.

3.)  Use a leaf cookie cutter to cut out pie crust leaves from chilled, rolled, unbaked pie crust. Use a sharp knife to score leaf veins for a rustic look. Place the leaves on a parchment fitted sheet pan so that they don’t touch, and bake at 400 degrees F for about 15 minutes or until just slightly browned. If you prefer, you can paint them with egg wash before baking or dust them with cinnamon after baking for a decorative touch. Serve leaf pie crust cookies with Chai Teacup Pies, 1-2 leaves per teacup.

Butternut Squash Crystal Dumplings

Butternut squash is one of my favorite ingredients to find on any fall inspired table. I love that its taste is somewhere between starch and vegetable, savory and sweet. In this recipe, we take the versatility of butternut squash to the next level, where East meets West.

For many, turkey is the highlight of a Thanksgiving meal, but for me it’s gotta be the sides. Butternut squash soup? We can do even better than that. These delicate little bites are stuffed with so many gorgeous autumn flavors…like Thanksgiving and Dim Sum hour all wrapped in one!

The goal when cooking with butternut squash is to enhance its subtle nutty flavor without overwhelming it. Some 5 spice (anise, cinnamon, cloves, fennel, and Szechuan pepper), soy sauce, sesame oil, honey, and freshly grated ginger add a touch of Asian flavor here. A twirl in the food processor after roasting and the flavors meld together to make a thick purée.

Stuffing roasted butternut squash into dumplings sounds like an impossible task, but it’s surprisingly easy to do as long as you use a secret tool…your freezer! Spoon out teaspoonfuls of the purée on to a parchment-lined baking sheet, then pop the sheet into the deep freeze until the blobs of squash harden completely.

Wrap each squash ball completely with a round piece of the crystal wrapper dough and you’ll have my cheat version of a crystal dumpling. No pleats or fancy edges here, just a simply constructed, round dumpling. And if you decide to go with store-bought dumpling wrappers you can skip the freezing step entirely.

What I love about these dumplings is that they are equally delicious with both Asian unflavored teas and other fall-inspired, flavored teas. Japanese houjicha, a fruity oolong tea, or even a vanilla and pepper laced Darjeeling will bring out the sweet nuttiness of the squash and Chinese 5 Spice. The most delicious way to serve these Butternut Squash Crystal Dumplings is atop some sautéed spinach for a colorful and healthful vegetarian meal…seasonal eating at its best!

Butternut Squash Crystal Dumplings

Makes 24 dumplings.

Ingredients:

{Filling}

1 pound of butternut squash, rind and seeds removed, cut into 1″ cubes

1 Tbsp grapeseed or vegetable oil

1/2 tsp sesame oil

1/2 tsp Chinese 5 Spice

1/8 tsp white pepper

1 Tbsp soy sauce

1 Tbsp honey

1/4 tsp grated ginger

pinch cayenne pepper, to taste (optional)

{Crystal Dumpling Skin}

This is a half recipe of Ha Gao skins, where vegetable oil is used instead of vegetable oil spread.

1 cup wheat starch

2/3 cup tapioca flour

1/4 tsp fine salt

1 Tbsp vegetable oil

1/2 cup water just before boiling (175 degrees F)

{Garnish}

sesame seeds

sautéed spinach

Equipment:

grater

half sheet pan

food processor

medium bowl

small sheet pan lined with parchment

tsp measure

large mixing bowl

work surface

knife

large ziplock bag

bamboo steamer lined with parchment

wok with slightly larger diameter than steamer OR a stockpot with exactly the same diameter as the steamer

Directions:

1.)  Preheat oven to 400 degrees F. With clean hands, mix all of the filling ingredients on the half sheet pan thoroughly. When the oven comes to temperature, bake the butternut squash for 30 minutes, until soft and lightly browned. Remove the squash from oven and set aside to cool for 10 minutes.

2.)  Process the roasted squash in a food processor fitted with a steel blade, until it becomes a smooth, thick purée. Place this purée in a medium bowl, then spoon out rounded teaspoonfuls on a small sheet pan lined with parchment. Place this sheet pan in the freezer until the squash balls freeze completely.

3.)  While the squash balls are freezing, make the Crystal Dumpling Skin by combining all the skin ingredients in a large mixing bowl. Mix the dough together with chopsticks, then use your hand to knead the dough until it comes together. Place the dough on a work surface and divide it into 24 equal pieces. Do this by shaping the dough into a log, and then cutting each log in half. Continue to cut each dough piece in half until you get 24 equal pieces. Roll each dough piece into a ball, then place the balls into a large sealed ziplock bag so that the dough balls don’t touch.

4.)  When the squash spoonfuls have hardened, start making the dumplings by flattening one ball of Crystal Dumpling Skin Dough in the palm of your hand. Using your other hand, flatten the dough into a 3″ circle, then place a squash ball in it. Envelope the squash ball completely with the white dough, sealing the edges so that the butternut squash doesn’t peek out of the skin. Place stuffed dumplings 1″ apart in a bamboo steamer fitted with parchment paper to prevent sticking.

5.)  Fill a large wok or stockpot half full with water and bring to a full boil. Place bamboo steamer on top of wok or pot, cover, and then steam the dumplings for 12 minutes while water is on full boil the entire time. Finish the dumplings with a sprinkle of sesame seeds. Serve them over sautéed spinach, right out of the steamer with soy sauce, mustard, or chilli sauce for dipping.