Bird’s Nest Tea Bombs

A few days ago, outside my living room window, I noticed a bird tucking in and out of the crevice between the misaligned wooden fence panels surrounding our house. The bird seemed busy at work–occupied. Amidst its constant activity, it managed to shoot me an occasional glare, so as to say back off lady, or you’ll regret it! It wasn’t until I saw the same bird again two days later that I realized what it was up to. Just in time to mark the beginning of spring, my feathery friend was building a nest.

I get it, birdie. There’s a lot of work that goes into nest-making. As I learned a few days ago making these Bird’s Nest Tea Bombs, making a sturdy nest is a labor of love…an art form, really. My tea nests are made from maple syrup marshmallows covered in tea leaves. Although they look like you’ve just spotted them in a thick woodland forest, they serve an entirely different purpose. They’re designed to be an all-in-one tea brew, sweetener, and treat.
This project for Bird’s Nest Tea Bombs was inspired by 2 things: my sister and some very beautiful tea. On last week’s Tea of the Week post, I featured Bellocq Tea Atelier’s No. 22 National Parks Dept. This nature-inspired blend of Darjeeling and Assam has bright green cedar tips and twiggy kukicha (twig tea) thrown in. It’s so perfectly organic and rustic that I still can’t get over how delicious it is.

As an Easter gift (and because she’s a cool gal with great taste), my sister Melissa sent me some dark chocolate blue robin candy eggs from a fantastically elegant candy shop in Beverly Hills called Sugarfina. These delightful candies and a tin of gorgeous tea married to make this whimsical confectionary DIY. Here, a small blob of marshmallow holds about 2 teaspoons of loose tea together, just the right amount for small teapot brew. Although you can use any marshmallow recipe to make these, I like to use a maple syrup base because it enhances the natural, mild sweetness of my steep. You can even make the marshmallows separately to snack on.

More than anything, these tea marshmallows are ornamental, so don’t expect a lot of sweetness when they dissolve in your brew. Use any twig or flower based tea to make these Bird’s Nest Tea Bombs–a mix with colorful visual interest is ideal. Above all, just remember to enjoy the candy eggs before dropping the nests into the hot water. Happy springtime brewing my friends!Bird’s Nest Tea Bombs

Makes 12 small tea nests. Each nest makes 2 cups of tea.

Ingredients:

2 tsp gelatin

2 Tbsp water

1/2 cup maple syrup

1/8 tsp cream of tartar

12 small egg candies

1/2 cup twiggy loose leaf tea (I used Bellocq’s National Parks Dept.)

Equipment:

large mixing bowl

medium pot

wooden spoon

candy thermometer

hand-held mixer with whisk attachment

lightly oiled rubber spatula

large piping bag with 1/2″ round piping tip (or just cut tip)

mini muffin tin

Directions:

1.)  In a large heat proof mixing bowl, bloom the gelatin in the water. Set aside.

2.)  Place the maple syrup and cream of tartar in a medium pot, mix with the wooden spoon, then place on low-medium heat until the mixture hits 250 degrees F. Use the candy thermometer and be careful to watch the mixture so that the syrup doesn’t boil over.

3.)  Meanwhile, place 1 rounded tsp of loose leaf tea in each of 12 mini muffin pan cavities.

4.)  When the maple syrup comes up to temperature, take it off the heat then gradually pour it into the bloomed gelatin. Use a hand-held mixer to whip the mixture until you get stiff peaks. Use an oiled spatula to transfer the marshmallow fluff to a large piping bag with a 1/2″ open tip for piping.

5.)  Pipe small dollops of marshmallow fluff into each tea-filled mini muffin pan cavity. Attach a candy egg in the middle of each dollop, then top the marshmallows with extra loose leaf tea to create finished nests. Each nest is enough to brew 1 small teapot of tea (2 cup capacity). Simply eat the egg candy, then throw the nest into hot water to brew.

Gingerbread Teacup

Just like that and Christmas is tomorrow! The last week has been so utterly hectic. Last minute trips to the mall, mad gift wrapping, and anxiously waiting for the UPS guy to show up with my deliveries has left me in serious need of a tea break. I’m sure you could use a break too, so here is my offering to you during this eventful holiday season: a Gingerbread Teacup–quaint and cozy–just in time for time for the big day tomorrow.
Last week I made a gingerbread house for my niece Maddy. With the spicy dough, I created heart-shaped windows, a deeply sloped roof, and a slender chimney that you could almost imagine smoke whispering out of. That’s the thing about gingerbread…it’s like playing with molding clay–ideal for those who like creating art out of food. The whole process got me thinking of how to shape gingerbread, especially since I’ve been meaning to finally put my brand new Sports Ball Pan Set to use. Sports ball? We can do better than that!

What’s great about the Sports Ball Pan is that it’s divided into 2 hemispheres, the perfect depth for a deep yet shallow teacup. To combat the gingerbread dough’s tendency to want head south while baking (because of the molasses and butter in the dough), I freeze the shaped tea cup dough before baking it. I also use the other empty hemisphere of the mold to compress the dough from the top to help create an even thickness along the lip of the cup. For maximum versatility, it’s also important to use a dough recipe that can tolerate some cutting with a serrated knife after being baked.

After baking off the tea cup piece, you’ll notice that the inside bottom of the teacup is thicker than the sides. This is simply a result of gravity doing its work during baking, so don’t worry! The cup is designed to be filled with lots of small edible goodies, so a thicker base means a sturdier base.

I’ve also tinted my royal icing with cocoa powder and cinnamon so that it looks like the color of the dough itself. This isn’t typical in gingerbread house making, but a good idea here since we want the tea cup pieces to come together to look continuous and smooth. The cocoa colored icing is used to attach the rim of the tea cup, which is simply made from creating a ring of gingerbread dough based on the diameter of the sphere.

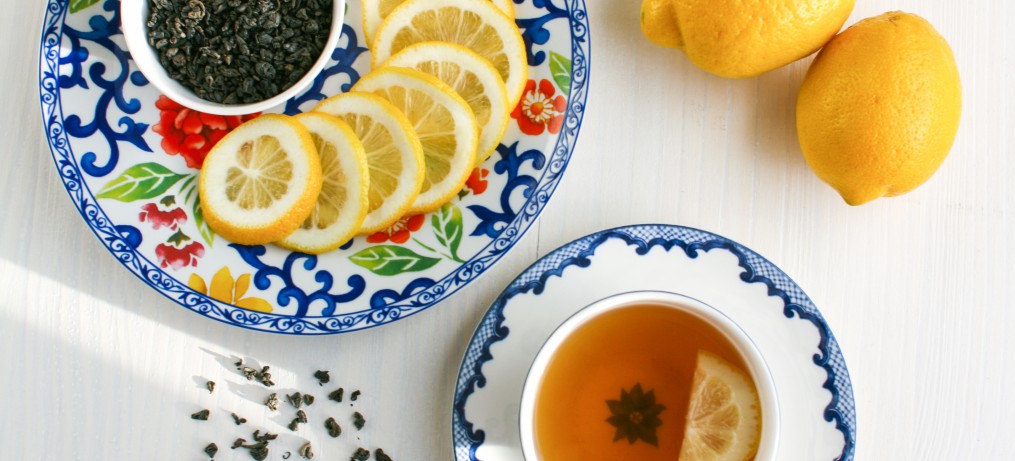
My sweet friend Danielle from This PictureBook Life bought me some yummy little Green Tea Kit Kats when she stopped over at Hello Kitty Con in Little Tokyo, so I thought this would be the perfect time to use (and eat!) them. You could certainly make your own tea-infused treats like Homemade Green Tea Pocky or Lemon Matcha Cake Bites, but if you’ve already made the cup, you should probably take a break now.

Truffles, biscuits, or even a pile of individually wrapped tea bags will steal the show in this homey little cup. Gingerbread Tea Cups: drink the tea, eat the cups! I’ll be taking this treat display over to my UK blogger friend Justine’s site for her Special Christmas Tea Time this week–you should come too! And with this post, I’d like to wish you a very Merry Christmas and send out a big thank you for following me along on my tea adventures this year! Happy Holidays everyone!!

Gingerbread Teacups

Makes 2 cups.

Ingredients:

{Gingerbread Dough}

1 cup unsalted butter, at room temperature

1 1/4 cups light brown sugar

2 eggs, at room temperature

2 tsp fresh ground ginger

2 tsp vanilla extract

1 cup molasses

2 tsp cinnamon

2 tsp ground ginger

1/2 tsp cloves

1 tsp baking soda

1/2 tsp salt

5 cups all-purpose flour

bench flour

{Royal Icing}

1 1/2 sifted confectioner’s sugar

2 Tbsp sifted cocoa powder

2 tsp cinnamon

2 tsp powdered egg whites

2 Tbsp water

{Embellishments-optional}

small piece of red fondant

small heart-shaped cookie cutter

candies or cookies for filling the tea cup (I used green tea Kit Kats)

sugar cubes

teaspoons

Equipment:

stand mixer with paddle attachment

rubber spatula

large mixing bowl

large work surface

rolling-pin

sharp knife

ruler

7″ plate or other circle to use as template

large baking sheet fitted with parchment

large spatula, for handling hot gingerbread

cooling rack

sports ball baking pansprayed with non-stick spray on the inner surface of one hemisphere, and the outer surface of the other hemisphere

serrated knife

medium mixing bowl

plastic piping bag

scissors

Directions:

1.)  Make the Gingerbread Dough. Cream butter and sugar together in the bowl of stand mixer on low. Meanwhile mix the cinnamon, ground ginger, cloves, baking soda, salt, and flour together in a large bowl. Add eggs, one at a time, to the creamed butter, mixing thoroughly after each addition. Use a rubber spatula to scrape down the sides of the bowl, then add the fresh ground ginger, vanilla, and molasses and continue to mix on low. Gradually add the spiced flour to the creamed butter until the dough is thoroughly mixed together. Place the dough on a large piece of plastic wrap, slightly flatten and seal tightly, then place the dough in the fridge to chill for at least 2 hours before rolling.

2.)  Shape the Teacup. After the dough has chilled, divide it in half, then roll one piece of the dough out to 1/8″ thickness with a rolling-pin on a large work surface generously dusted with flour (leave the other half covered in plastic wrap in the fridge). Roughly cut out a 10″ circle, then gently lay this piece of dough into one half of the ball baking pan (the hemisphere with the inner surface greased). Fit the dough into the pan as if you were laying pie crust into a pie plate, making sure the dough fits snugly and evenly against the ball pan. If there are tears, carefully patch them with scraps of dough. Trim off excess dough laying over the edge of the pan with a sharp knife. Place the mold fitted with the dough into the freezer to freeze until solid.

3.)  Create a Handle. Cut out a 1/2″ by 5″ strip of dough from the rolled dough. Shape it into the shape of a half heart, then place it on a large baking sheet.

4.)  Create a Tea Cup Rim. Cut out a 6″ round (using the empty hemisphere), then cut out a 5 1/2″ circle inside of the dough cut-out, creating round ring. Carefully transfer this dough ring to the baking sheet.

5.)  Create a Plate. On the rest of the rolled dough (or scraps re-rolled to 1/8″ thickness), place a 7″ plate. Cut around the plate with a sharp knife to create a gingerbread plate. Transfer this 7″ round of dough also to the large baking sheet. Lightly press the bottom of one of the ball molds into the center of the round to create a “ditch” for the teacup to sit in later. Place this plate also on the baking sheet.

6.)  Bake Cup, Handle, Rim, and Plate. Pre heat oven to 375 degrees F. When the oven comes to temperature, Place the dough teacup into the oven, with the other greased half of the mold (the empty hemisphere, greased on the outside) pressed snugly against the top surface of shaped dough. This will help the dough to create stronger “sides” on the teacup. Bake the shaped teacup dough for about 15 minutes, then remove the top pan and bake for an extra 12-15 minutes until the gingerbread is slightly puffed and stiff to the touch. Bake the handle, teacup rim, and plate for about 10 minutes until the handle is slightly puffed and stiff to touch, then remove the handle and continue cooking the teacup rim and plate until they are also finished baking. You may need to take the rim out at a different time than the plate so that the gingerbread doesn’t burn. Place any finished pieces of gingerbread on a cooling rack to cool. For the teacup, let it cool while it is still sitting in the ball pan.

6.)  Trim the Gingerbread Tea Cup and Handle. When the gingerbread tea cup pieces have fully cooled, use a serrated knife to create clean, flat edges. For the tea cup, trim the jagged upper edge so that it lays flush against a flat surface when turned upside down.

Trim the half heart-shaped handle to fit flush against the side of the teacup. It’s best to trim just a bit at a time as you see necessary.

Repeat steps 2-6 to create a second set of teacup pieces.

7.)  Make the Royal Icing. Mix all the icing ingredients together in a medium bowl, then place the icing into the piping bag. Cut a small edge off from the bag’s tip, then use the royal icing to glue the handle to the teacup, and the teacup base to the plate. Also attach the tea cup rim to the top of the teacup, wiping off any excess icing with your finger to create a clean appearance.

8.)  Attach Tea Cup Embellishments. You can make small heart-shaped gingerbread cookies from re-rolled scraps. Also, you can roll out a small piece of red fondant and then cut it using a decorative cookie cutter, attaching it to the teacup with a dab of icing. Fill the teacup with cookies or candies. Sugar cubes and teaspoons also make charming finishes. 

Christmas Tea Trees

In the world of tea, tea bags often get a bad rap. Flavor wise, some teas are worthy of that bad reputation, but in today’s market there are actually many tea bag based brands that do a good job of bringing on the flavor. Even better, tea bags are convenient–no mess, no fuss…almost effortless to use!

A few years ago I remember watching Dylan Lauren from Dylan’s Candy Bar (you know, Ralph Lauren’s daughter) make Candy Topiaries on the Martha Stewart Show. Mesmerized, I made several of these festive topiaries for friends and family and they were an instant hit. My only gripe? They required way too many mini candy bars, making the trees weighty and apt to toppling over.christmas tea trees 4

Today’s Christmas Tea Tree craft is the tea version of those topiaries, except that they are lighter, prettier, and best of all…healthier! This project requires just a few items, the first of which are individually wrapped tea bags. That being said, the more attractive the wrapping is on the tea bags, the better. And to continue the tree theme I always like to add at least a few green tea bags into the mix.

My best suggestion is to look up the brand of tea bags you plan on buying before you get to the store. Some tea bags aren’t individually wrapped, so you just want to make sure. My favorite brands to use for modern looking trees are Pukka or Tazo tea bags, but for a more traditional look go for Twinings or TWG.

Customize this Christmas Tea Tree for any occasion by switching up the color palettes and tea flavors. A wrap of cellophane and a large bow, and you have unique gift that will be the centerpiece of holiday tea drinking!

Christmas Tea Trees 

What You’ll Need:

styrofoam cones

individually wrapped tea bags, the number depends on how big the cone is

glue gun with glue sticks

small paper mache boxes or some kind of short, round cylinder to use as the “stump”

wooden stars or other star trinkets for embellishment

rice, for weighing down boxes (optional)

Step-By-Step:

1.)  Adhere tea bags starting at the base of the cone. Place a thin line of hot glue along the upper edge of the back of a tea bag, then attach it to the cone. Hold the tea bag in place until the glue sets.

2.)  When you glue the next tea bag, slightly overlap it over the one that was just glued so that you cover up the styrofoam cone underneath. How much you overlap the tea bags depends on the size of your tea bags. Finish the entire base before moving upwards, then repeat the gluing process until you reach the top.

3.)  Attach the top of the paper mache box to the base of the cone using hot glue. 
For more stability, add some rice in the bottom half of the box to serve as a weight, then use glue to seal the top piece of the paper mache box to the bottom piece to create one unified “stump.”

4.)  Attach a wooden star trinket to top of the cone, again using hot glue. When it’s tea time, carefully rip the tea bags off the tea tree and enjoy!

Magnetic Tea Chalkboard

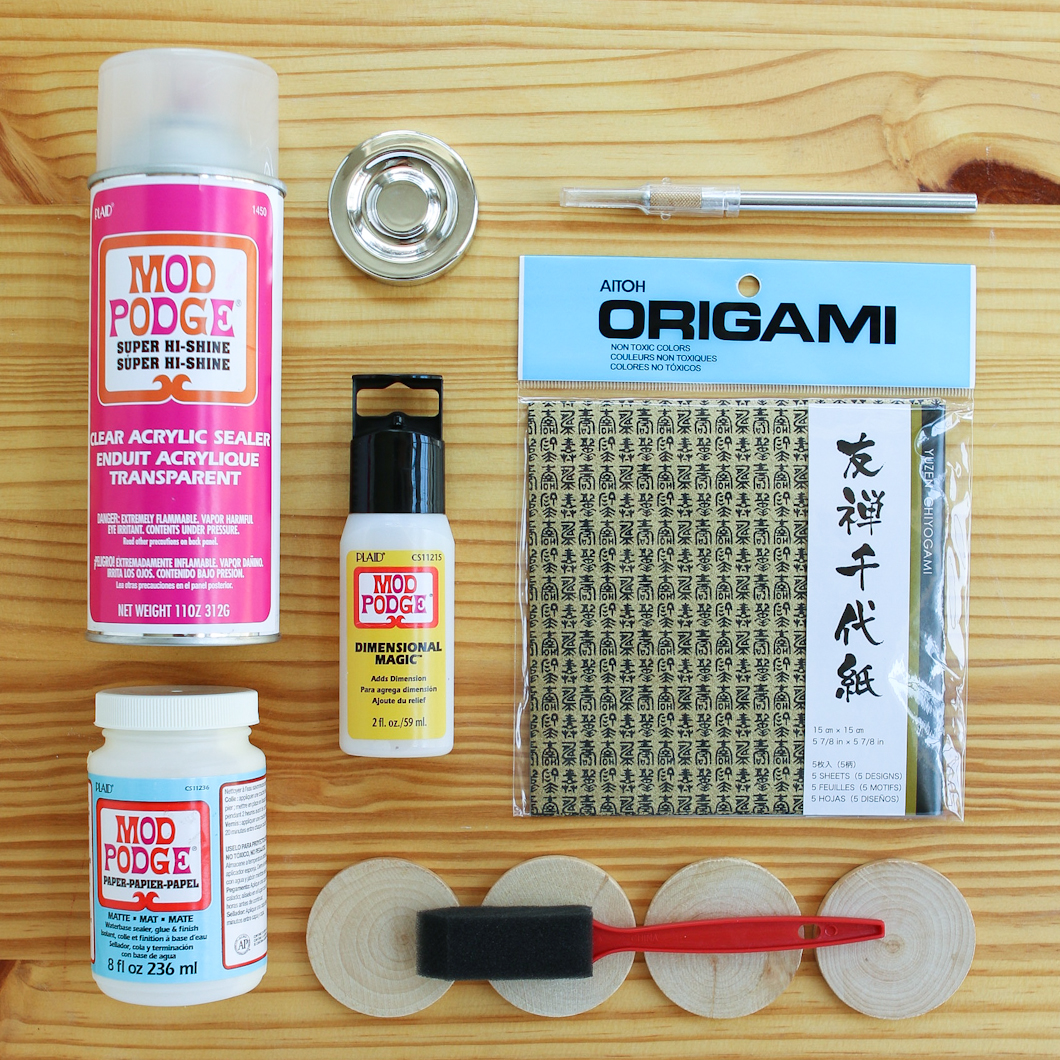
During the the busy holiday season, I only make crafty gifts for those I love most. A few weeks ago, I created a Magnetic Tea Board for my dear friend Danielle over at This Picture Book Life. She seemed thrilled to receive it, and at the very least I was proud to call it one-of-a-kind, something she couldn’t buy in a store.
As Danielle prefers herbals over the caffeinated kind, I filled her tea board with tisanes like honeybush, peppermint, and Hawaiian Mamaki tea. That’s the great thing about this little project, you can tailor the tea board to please all kinds of tea drinkers. How about a tea board with a variety of chai teas or only Christmas themed teas? The possibilities are endless.  And speaking of possibilities, you can use this board for much more than just tea. The favor tins could hold spices, vitamins, sprinkles, jewelry, or even your workspace desk supplies! Depending on what your frame looks like, you can play around with the shapes of tea tins you use. Just make sure that you use sturdy tins, well made ones that have tops that snugly attach to the bottoms so that the tins’ contents are well contained.

If you use this magnetic board for tea, a tea timer is a nice touch to the project. Although I like to use an elegant sand tea timer, you could also use a precise digital tea timer instead. The key is to pick the frame, timer, and teas to suit a specific style. The board that I made here has a slightly French look, inspired by the sexy little tea timer that I bought from Fauchon in France.

I guess it’s a bit ironic that I used labels on this chalkboard, but if you’ve ever seen my penmanship–trust me, it would make sense. If you are able to write out a lovely script, by all means show it off here! I’ve decided to go the more reliable route, using an embossed label maker. I love that the embossed label gives the board a trendy vibe, so that the aesthetic elements of the board come together to look organized.

There’s nothing like a hand-made gift to tell someone how much you appreciate them. This stylish and versatile Magnetic Tea Board has so many uses, I love that it’s a visual reminder to make time for a tea break. Make one for yourself or for someone special…there couldn’t be a better gift for the avid tea-lover.

Magnetic Tea Chalkboard

What You’ll Need:

magnetic chalk board sheet

12″ x 12″ frame, glass removed

adhesive craft magnets

favor tins

4 button magnets

tea timer

permanent craft glue (p.s. the glue from a glue gun won’t work here)

label maker (optional)

chalk

a selection of teas

Step-By-Step:

1.)  Prepare the magnetic chalk board by inserting and securing the magnetic chalk board sheet into the 12″ x 12″ frame.

2.)  Attach 1 adhesive magnet to the back of each favor tin you plan on using. Now the tins are ready to be filled with teas of your choice.

3.)  Attach the button magnets to the back side of the tea timer using the permanent craft glue. Let the glue dry according to the package instructions before attaching the timer to the magnetic board.

4.)  Create labels for the teas using the label maker, or simply use chalk to write in the names of the teas onto the board wherever you see fit.

5.)  Affix the labels on the board, then attach the tins and tea timer onto the board. Hang the finished tea board up in a convenient location (in the kitchen, or by your desk at work) for an effortless and organized tea time…enjoy!

Peppermint Tea Bath

My hubby and I are planning a trip to Whistler in Canada this February. It’ll be my first time at a ski resort, so as a non-skiier I’m not quite sure what to expect. Cabins, snow-laden trees, mugs of hot cocoa–there’s an image that I have of what ski-resorting looks like, and these Peppermint Tea Bath Salts are a part of that picture.

This Peppermint Tea Bath takes minutes to make but is so perfect for chasing away those wintertime blues. The bath mix gets a punch of brightness from a healthy dose of peppermint tea that not only helps to nourish your skin, but also gives off a naturally invigorating scent. While the epsom salts help to soothe tired muscles and soften skin, some clean, pine-like tea tree essential oil helps to give an uplifting dose of aromatherapy.

If you haven’t ever tried using epsom salts for taking baths or making body scrubs, they are simply fantastic. Just before summer this year I made a luxurious Lavender Foot Soak. This Peppermint Tea Bath is the winter version of that. The best way to package the bath salts is to place them into cotton sachets that you can tie up and throw right into your bath. The cotton bags are reusable, so simply fill them up again when it’s time for your next luxurious dip.

If you’d like your Peppermint Tea Bath to smell more peppermint-like than pine-like, feel free to use substitute some peppermint essential oil for a portion of the tea tree oil. You might smell like a walking candy cane (or like my favorite Candy Cane Green Tea) afterwards but hey, who said that’s a bad thing? Personally, I like to use 2 cups of this salt blend to make one hot, relaxing bath. Peppermint Bath Salts are an ideal gift or stocking stuffer for anyone in need of a little wintertime pampering. Mix a batch up for yourself and you’ll see why!

Peppermint Tea Bath 

What You’ll Need:

large mixing bowl

spoon

2 cups epsom salt

1 cup loose peppermint tea

20 drops of tea tree essential oil, or 10 drops tea tree essential oil + 10 drops peppermint essential oil

cotton tea bags or a large, double layer of cheesecloth with a tie

lidded jars, for gifting (optional)

Step-By-Step:

1.)  Mix the salts, tea, and essential oil together in a large mixing bowl. Place the mixture in cotton tea bags, lidded jars, or some other containers until ready to use.

2.)  When ready for the bath, place 1-2 cups of the salts into cotton tea bags or a large piece of cheesecloth, then tie to make a closed pouch. Let the fragrant salts dissolve into a large tub of warm water, then sit back and relax!

Pumpkin Tea Set

A few years ago, my hubby carved a very impressive Yoda themed pumpkin about a week before Halloween. We set it outside on our porch, and two days later the pumpkin had become a festering mess, aged from the heat and warmth of California sunshine. I know better than to carve my pumpkins too early now, so I carved my bright orange beauties on the brink of Halloween this year. I collected 1 small pie pumpkin and 2 Wee Bee pumpkins from my random visits to the market over the last few weeks, and now it was time for them to meet their fate.

What did I carve from my pumpkins? Well, I carved them into a tea set for two of course! The tea set is complete with a regular sized teapot and 2 sturdy teacups, just in time for a mid-autumn Pumpkin Chai Latte break!

Although you could serve any fall tea in this cheery pumpkin teapot, a Pumpkin Chai Latte is definitely the way to go. I must say, I’m in love with my Pumpkin Chai Latte recipe…it’s smooth, creamy, and has just the perfect spicy kick to it. My secret ingredient is freshly and finely ground black pepper, which makes it over-the-top delicious.

The best part about using a pie pumpkin to make a pumpkin teapot is that you can later use the teapot to make pie! Using a smaller variety of pumpkin will also allow for easy pouring when tea time comes along. In fact, don’t use a larger pumpkin for this project. The perfect teapot pumpkin has an even base, doesn’t have any soft spots, and doesn’t weigh more than 2 1/2 pounds. 
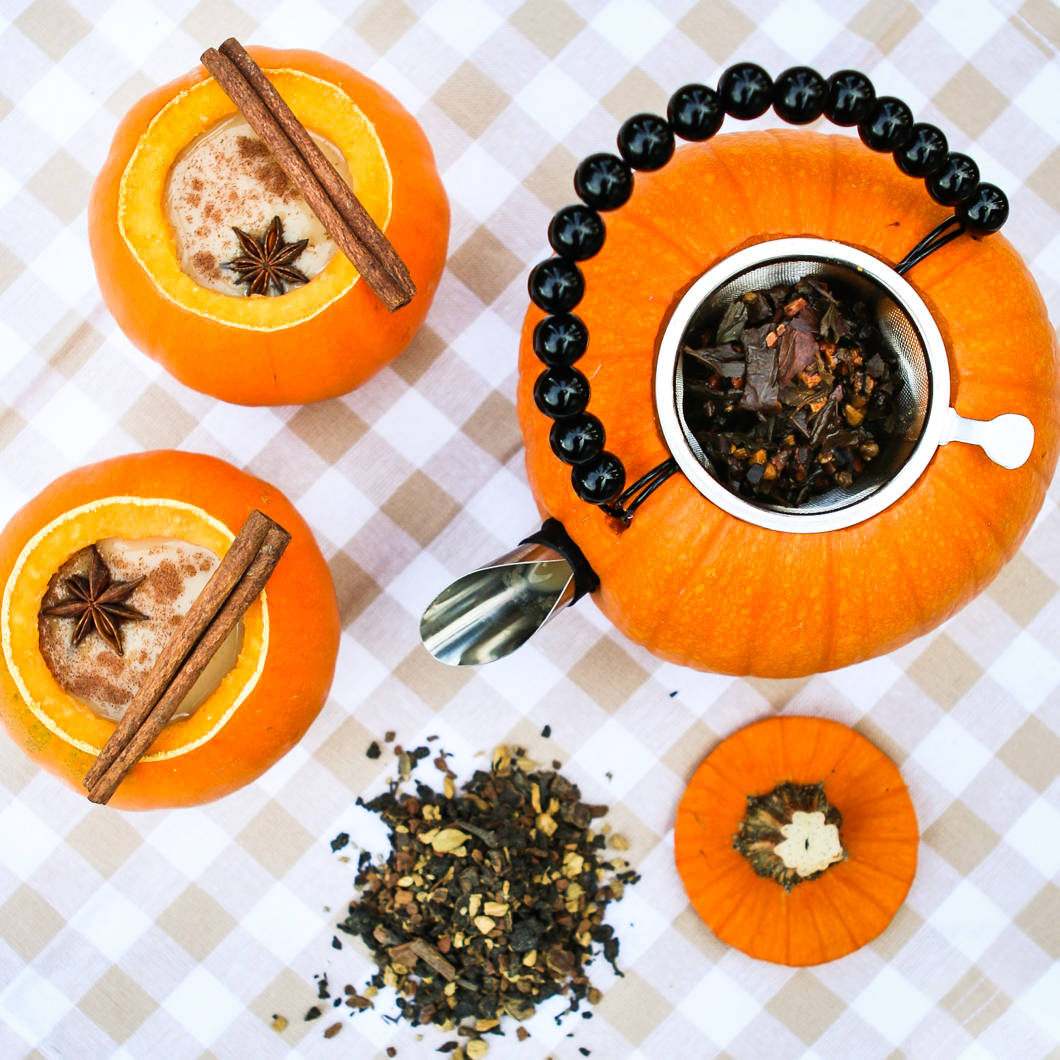
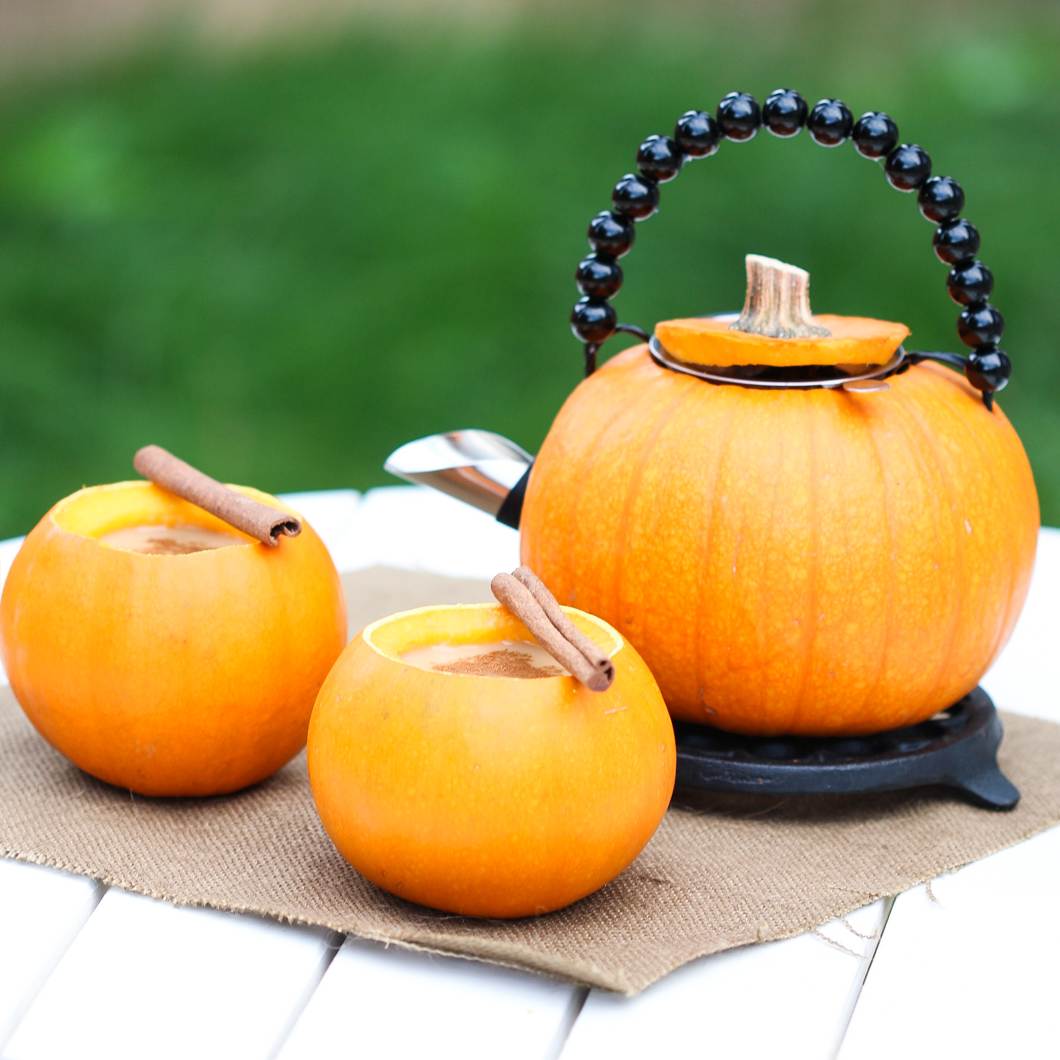
And with that I’d like you wish you a very Happy Halloween this year! If you are too busy passing out candy and don’t have time for the tea set, do yourself a favor and at least make the Pumpkin Chai Latte. Nothing could taste better on a crisp fall day!

I’ve decided to take my Pumpkin Tea Set and Chai Lattes over to celebrate Fiesta Friday this week..meet me there!

Pumpkin Chai Latte

Serves 2 with refills. 

Ingredients:

2 cups strongly brewed chai, preferably loose leaf ( I used a ratio of 1 cup water to 1 Tbsp chai)

2 cups vanilla almond milk

1/2 cup pumpkin purée

1/4 cup honey or to taste

1 tsp vanilla

1/2 tsp cinnamon

1/4 tsp nutmeg

1/4 tsp finely ground black pepper

1/8 tsp ground cloves

1/8 tsp ground ginger

pinch salt

Directions:

1.)  Combine all the ingredients in a pot, bring to just under a boil, and serve!

Pumpkin Tea Set

What You’ll Need:

1 pie pumpkin, just under 2 1/2 pounds

2 Wee Bee pumpkins

wine pourer

12 gauge black aluminum wire (you can find this in the jewelry section of the craft store)

decorative beads, enough to cover the length of handle (make sure the wire will fit through them)

tea strainer

pumpkin carver or serrated knife

pliers

wrench

spoon

pen

ruler

scissors

Step-by-Step:

1.)  Gather the goods.

2.)  Use a pen to outline the diameter of the mesh strainer on the top, center of each pumpkin

3.)  Cut the caps off of the teacups/Wee Bee pumpkins and the large pumpkin.

4.)  Dig out the seeds and string.

5.)  Spoon all the seeds and string out of the teapot and teacups before proceeding with making the teapot.

6.)  Make the teapot by marking a dot 1″ from the inner cut edge on the pumpkin. Repeat this again on the other opposite side of the cut opening. Measure out a 2-foot piece of the wire and cut it with scissors.

7.)  Use the screwdriver to make a hole where the ink dots are marked.

8.)  Wrap one end of the wire in the hole once…

9.)  Then wrap the wire over a second time…

10.)  This is the time to loop all the beads through (not pictured). When you’ve looped the wire with beads to a reasonable length of your liking, it’s time to seal off the handle and cut off any excess wire. Again, mark a hole on the opposite side of the teapot opening, use the screwdriver to penetrate through the marked hole, then make a double wire loop to create a finished teapot handle.

10.  Make the spout by creating a hole to fit the narrow end of the wine pourer. Angle the spout at a 60 degree angle from the base (i.e. the tip of the pourer points upwards). Make the hole slightly narrow so that the wine pourer will fit in snugly and not leak.

11.)  Push the narrow end of the wine pourer into the hole until it fits in very snug…the teapot is complete!


Boba Thai Tea Shooters

A few months back I received an email from my blogger friend Lan over at morestomach. Lan had messaged me to ask about making Thai Iced Tea, that much-loved sweet orange concoction that Thai food lovers can’t seem to get enough of.

In our chats, I shared with Lan a few tips on making Thai tea and some ideas on where she might be able to find some (you can find it at Asian markets, Amazon, or Teavana). We then discussed how the tea gets that strange yet inviting bright orange color. Lan’s food style is pure, clean, and elegantly composed, so I had to break it to her gently…that neon coloring is artificial.

I put this recipe together to use up the last of my Thai tea stash that’s been hanging out in the back of my tea cabinet over the last year. Since it’s Halloween this week, I figure I should put that orange brilliance to good use and make some festive Thai Tea Shooters in test tubes, complete with a few boba balls for an extra spooky effect.

Today I’m using plastic test tube favors to make these shots. I found them on sale at my local craft store (Michaels) over the weekend (part of the Martha Stewart line), and can’t get over how adorable they are. Glass tubes would be so much classier, but hey, it Halloween, so a bit of tackiness is allowed right!?

There’s really nothing to making Thai Tea. The hardest part is waiting for it to cool down so that it doesn’t melt the ice that you serve it with. Luckily, that’s not an issue here because these shots are made with well-chilled tea. This way, there’s no need for ice and the tea keeps its strong flavor and creamy appearance.

Another tip for making good Thai Tea is to boil the tea for a long time. This type of full flavored tea isn’t sensitive to heat like traditional brews are, so it’s fine to boil the tea for up to 15 minutes instead of just steeping it. A darker, more concentrated brew will be tastier than a lighter one, since you can always adjust the strength of the tea with the stronger version.

What character are you planning to be this Halloween? If you’re having a get together and know that your guests are Thai tea fans, be a Mad Scientist and make some ghastly Boba Thai Tea Shooters! These curious little treats will be the delight of any creepy bash!

Boba Thai Tea Shooters

Makes 12-15 test tube shots.

Ingredients:

1/2 cup loose leaf Thai tea

1 quart of water

1/2 cup sugar, or to taste

1/2 cup half-and-half

2 tsp vanilla extract

1 cup boba tapioca balls, prepared according to package instructions

Equipment:

large pot

large heatproof pitcher

a double layered piece of cheesecloth

fine mesh strainer

test tube favors (I used Martha Stewart brand)

tall basket or test tube holder

Directions:

1.)  Boil the water in a large pot, add the tea, then lower the heat to a rolling boil for 10-15 minutes. After 15 minutes, strain out the leaves by pouring the tea through a cheesecloth-lined fine mesh strainer into a large heatproof pitcher.

2.)  Add the sugar to the tea just after boiling. Feel free to play around with the amount of sugar to suit your taste. Let the tea cool to room temperature. Mix in the half-and-half and vanilla extract, then place the tea in the fridge to chill completely.

3.)  Pour the tea into test tubes until they are 3/4 full. Just before serving, add a few boba balls to each tube, then cap with the corks and place the test tubes in a test tube holder. You’re done!

*** Entertaining Tip: It’s a good idea to have some fat boba straws for your guests to use for drinking. If the boba sits around at the bottom of the test tubes for a long time, they may tend to stick there. The straws will allow for easy drinking if you happen to need them, especially if you are wanting to make the shots ahead of time.

Tea Tin Topiaries

There’s something mysterious and elegant about black tea tins. Many times, a black tea tin indicates the classic, traditional, and signature blend of a tea shop–a blend to be savored and cherished.

As you might imagine, my tea cabinet is literally bursting at the seams with tea tins of all shapes and colors. Many of the tins in my cabinet are actually empty. When opened, these empty tins carry the faintest essence of steeps past, a reminder that it’s either time to stock up again or time to get crafting!

Around Halloween, black and orange tea tins take on new meaning. They make artful, eye-catching decorations that aren’t the least bit tacky. The empty tins that I have the most of are Mariage Frères tins–so very chic and distinctively French. Just a glimpse and they give me the fondest memories of my tea adventures in France last year.

Some other tins that remind me of Halloween include the tins from Disney’s Mad Tea Party Blend and Harney & Sons’ Hot Cinnamon Sunset. These blends are black tea based, but while one is fruity (apricots!), the other is spicy. Both are delicious choices for fall tea-drinking.

To make these topiaries distinctively Halloween-like, I’ve used pumpkin seeds to create natural-looking greenery instead of using loose, dried moss. Pumpkin seeds are the perfect color of leaf green, and lie flat when glued onto styrofoam using a matcha infused buttercream. The lightweight seeds help to accentuate the form of the styrofoam base, which I’ve even used for making macaron towers before. I like to finish these arrangements with sparkly black spider stickers and some Halloween themed ribbon for a faintly “spooky” effect.

Once you find the right color of tea tin and some seasonal embellishments, Tea Tin Topiaries are perfect for any holiday occasion. For Halloween, Thanksgiving, or even Christmas, these structured garden pieces are easy to put together and make whimsical little centerpieces. This year, I’ll be placing these topiaries by large bowls of candy for a festive touch when the trick-or-treaters come knocking. It might be wishful thinking, but I’m hoping the sugar-crazed kiddos keep their hands off of my seed and candy creations…looky no touchy!

Tea Tin Topiary

Makes 1 topiary.

What You’ll Need:

bamboo lollipop stick

2 styrofoam balls ( I used a 3″ diameter ball) or 1 styrofoam cone (3″ x 6″) + 1 styrofoam ball (3″)

serrated knife

glue (hot glue/glue gun works best and fastest)

1/3 cup pumpkin seeds

large plate

matcha powder (just enough to give the icing a light green tint)

1/4 cup white icing

icing spreader

decorative ribbon

scissors

spider stickers (optional)

tea tin

colorful, small decorative candies for topping off the base of the tins and for helping to adjust the height of topiary (how much depends on size of tin)

Step-By-Step:

1.)  Cut a half-inch slice from one styrofoam ball to create a flat base for the topiary. Stick the lollipop stick into the middle base of another ball or cone, about 1″ in. Stick the other side of the stick into the styrofoam ball base, again about 1″ in. Use glue to attach both ends of the stick to each styrofoam piece. Make sure the topiary is standing perfectly straight before letting the glue dry completely.

2.)  Mix the matcha in with the icing. Use the spreader to spread a thin layer of the green icing onto the top styrofoam topiary piece. Over a large plate, attach the pumpkin seeds by scattering them on the surface of the iced styrofoam. Use your fingers to flatten them to the surface of the icing, and fill in any open icing gaps with more seeds.

3.)  Place some candies into the base of the tin. You may need to place more or less depending on how high you want your topiary to be. Place the topiary’s base into the semi-filled tea tin, adjust it so that it stands straight, and then fill the tin with remaining candies until the base is full with them. The weight of the candy will help to keep the tower in place.

4.)  Tie or adorn the topiaries with ribbon. If you want to wrap the cone like I did, use a dab of hot glue on one end of a long piece of ribbon, then secure it to the bottom edge of the topiary. Wrap the ribbon carefully around the surface of the topiary, then use another dab of glue to secure the other end of the ribbon onto the top edge of the topiary. Snip off any excess ribbon. If using, attach spider stickers on the topiary for a “spooky” effect.

Afternoon Tea Greeting Card

The art of a handwritten card is all but lost in today’s internet age. Coming from a blogger it hardly makes sense to say such a thing, but if you can remember the last time someone put pen to paper to write you a heartfelt note, then I’m sure you’ll agree: a stroke of cursive can speak volumes.

One of my favorite stores has to be Papyrus, the mecca for eye-catching, one-of-a-kind cards. Sometimes I look at their cards and think: “Wow, this is so cute!” Other times, I think: “Hey, I could totally make this…”

This Afternoon Tea Greeting Card is inspired by all those delightful treasures I’ve come across at Papyrus. For the longest time, I had this adorable wrapping paper print called Tea Time lying unused in my craft drawer, and I figured that this was the perfect opportunity to use it.

You might already know from my previous posts how much I love Mod Podge Dimensional Magic. In this project, this craft glue adds a thick layer of glaze to the paper teacup and teapot designs so that they give off a shiny, porcelain-like lustre.

Some of the teacups will be hung, some will be shelved, and the teapots will be set up right up along side a fresh pile of green tea. In my opinion, this little card is an artful gift in itself. Although it’s perfect for Mother’s Day or as a birthday card, I think it’s most special when given was a thinking of you card for someone who simply loves tea.

Afternoon Tea Greeting Card

What You’ll Need:

teacup and teapot images (I used Caspari’s Tea Time gift wrapping paper)

1 blank greeting card with envelope (I used a 5 1/2″ card)

small piece of card stock (I just used another blank greeting card)

3 wooden skewers (the culinary kind you use for kabobs, cut to 5″ to fit my size card)

6 small silver brads

2′ decorative twine, cut into 5 equal pieces

1 1/2″ piece decorative string or twine

1 teabag or 1/2 tsp loose tea

Mod Podge Dimensional Magic

paper glue

strong gel adhesive or hot glue w/ glue gun (that dries clear)

4 adhesive foam dots (I used 7/16″size)

sharp scissors

1/16″ hole punch

regular hole punch (optional)

Step-By-Step:

1.)  Prep the Images. If using Caspari’s Tea Time wrapping paper, cut around teacup and teapot images, leaving a 1/8″ border around the pictures. You will need 8 teacups and 2 teapots to make 1 card.

2.)  Apply an even, thin layer of paper glue on the back side of all the cut images, then stick them onto the small piece of card stock. It’s ok to glue one image right next to the next one.

3.)  After you’ve glued the images to the card stock, use the Mod Podge Dimensional Magic to trace and fill the images so that they will appear shiny (and dimensional) later. You will need 5 teacup images outlined without a dish, 3 teacup images with a dish, and 2 teapots.

4.)  Let the Dimensional Magic dry for about 2 hours, until it is completely dry and clear. Use a pair of scissors to precisely cut the images out–5 teacups, 3 teacup with dishes, and 2 teapots–without any remaining border. Set the images aside.

5.)  Make a Row of Hanging Teacups. Use 1/16″ hole punch to punch a small hole in the handle section of each teacup (without dish) image. With each of the 5 pieces of twine, thread one teacup (without dish) through, then tie a knot to create a loop that is 2″ around (1″ when thread is doubled up). Repeat this process 5 times to create 5 “teacup charms.”

6.)  Open up a brad, loop one teacup charm into the center of the brad, then wrap the brad tightly around the wooden skewer so that it doesn’t slide around easily. Cut off any excess twine that goes past the knot. Repeat this process 5 times so that all 5 “teacup charms” hang off of the skewer using the 5 brads.

7.)  Attach the Teacups, Teapots, and Skewer Shelving. Stick two adhesive foam dots on the back side of each of the 2 teapots.

8.)  Place all the images on the card in the exact locations where they will be glued down…just eyeball it until it looks good. I like to place the hanging teacups as the top row, the sitting teacups (with dishes) as the second row, and the teapots on the bottom row. For the bottom row, make space to glue the 1 1/2″ piece of decorative string later (this will become the plate with the tea on it).

9.)  Use the gel adhesive or hot glue to attach the 3 skewers to the card. Use the gel adhesive to glue the teacups (with dishes) onto the card (to sit on the middle skewer/”shelf”). For the bottom shelf, peel the protective cover off from the adhesive foam dots (on the back of the teapots), then affix them to sit on both ends the bottom skewer.

10.)  Add a Large Pile of Tea! Create a smile-like shape with the 1 1/2″ piece of string so that it looks bowl-like from the side. Glue this string piece in the middle of the bottom row/skewer. Finally, use the Dimensional Magic to create a triangular, pile-like formation of glue atop the “bowl.” Rip open the tea bag and use your fingers to carefully sprinkle the tea leaves on top of the Dimensional Magic so that they stick. Let the card dry for a few hours or overnight, then turn the card over and knock off any of the excess tea…your Afternoon Tea Greeting Card is complete!

Asian Teacup Coasters

Coasters are that item that you don’t think you need until you actually need them. This simple craft project produces a petit version of regular sized coasters to suit Japanese, Chinese, and Korean style teacups with a narrower base. Natural-looking yet finished, these artistic little rounds are designed to complement the beauty of any Asian-inspired tea experience.

There’s something that I love about the shiny thickness and clarity of lacquer that I wanted to re-create with this project. For me, the best medium for a pretty, glistening lacquer finish is wood. To start, I use some unfinished wooden disks that are easily found in the wood section of your local craft store.

The rounds are only a little over 2″ across and 1/4″ thick. I like that the wood rounds are sturdy and have weight to them, since many Asian-style teacups are heavier and bulkier than English-style teacups. Use whichever size rounds suit your teacups, even larger or thinner ones will work great.

The lacquer finish on these coasters is achieved by none less than 3 kinds of Mod Podge. If you are wondering–no, I’m not being sponsored by Mod Podge for this post. I just love the stuff! The most unique of the 3 “Podges” is Dimensional Magic (the yellow one). Dimensional Magic creates a clear yet slightly puffy surface that is water tight, which helps to protect and preserve the beauty of the chiyogami paper used here. With this special resin, a quick rinse or wipe with water won’t be problem for these coasters.

I used a set of origami paper that came in riffs of gold and black to help this coaster set look cohesive without looking boring. Feel free to use whichever decorative papers look good to you, but try to pick a paper with good-quality texture and a pretty print that won’t warp after you apply glue to it. Chiyogami’s fibrous composition makes it malleable and soft, especially after it comes in contact with glue, which means that it adheres to wood like fabric would.

The longest and hardest part of making these coasters is waiting for them to dry. Although the Dimensional Magic glue states to wait just 3 hours, it’s really a good idea to wait a full 24 hours before putting these coasters to use. The thick layer of glossy resin will dry hard, clear, and ultra-sturdy this way, making it ready to withstand the weightiest cup of fragrant Asian tea.

Asian Teacup Coasters

What You’ll Need:

wood rounds

spice jar lid or other hard round with a diameter 1/8″ less (slightly less) than the wood rounds

origami/chiyogami paper

X-Acto Knife

glue sponge or brush

glue for paper (I used Mod Podge for Paper)

clear acrylic sealer ( I used Mod Podge Super Hi-Shine)

Mod Podge Dimensional Magic (do not shake before using)

pieces of paper or cardboard to use as a work surface

Step-By-Step:

1.)  Use X-Acto Knife to cut a round of origami paper that is 1/8″ less than the diameter of the wood round. Find a perfectly round and hard object to do this (I used the top of a spice jar). You can use a camera lens cover or the lip of a small bowl/ glass to do this. You can also use a round circle paper punch if you can find the right size. Cut the circles out over a covered, cut-friendly work surface. Please take extra pre-cautions and care when using an X-Acto Knife…they are so incredibly sharp!!
2.)  Use a sponge brush to lightly apply an even layer of paper glue to the back of each origami paper round. Apply the glue all the way to the edges, then stick the paper round directly on top of the wood round, keeping it in the center so that there is a bit of a wood border around the paper round. Let the rounds dry for 10 minutes.

3.)  Now use the acrylic sealer spray to evenly spray over and around the sides of each coaster. I apply 3 coats, each about 5 minutes apart in a well-ventilated place. After you’ve applied the 3rd coat, let the coasters dry for 1 hour.

4.)  After 1 hour, apply the Dimensional Magic on top of the edge of the paper and gently nudge it to the end of the coaster without actually letting it drip over. With this step we are sealing the paper so that it can’t come in contact with water later.

5.)  After sealing the edge of the paper round, then gradually fill the center portion of the coaster completely and evenly with the Dimensional Magic. Take care to cover the paper completely, with no gaps or air holes in it. When it is applied, the Dimensional Magic is slightly opaque, but don’t worry–it will dry completely clear. If you notice an air bubble, use the X-Acto Knife to pierce it (then wipe off the knife carefully).

6.)  Let the coasters dry for a full 24 hours, until completely hardened and clear. If they need to be cleaned, the best way to do this is by wiping them down with a damp paper towel or washcloth. Asian Teacup Coasters are a great entertaining accent and also make a unique little gift or party favor.